Item Group
A way to sort things in your inventory system is to use an Item Group. It helps you logically group products or services by their type or how they are used. This Classification is important for managing inventory, applying tax rules, setting default accounts, pricing, and displaying products on your website (if applicable).
Why Use Item Groups?
- It facilitates improved item organisation.
- Facilitates the process of searching and filtering.
- Permits automatic application of default settings, such as price list, warehouse, and tax.
- Encourages proper taxation and accounting.
- It is necessary for the display and classification of websites.
Example of Categorization:
Depending on the nature of the product, you should assign it to a relevant group:
- Assign the item to the group “Service” if it is a service.
- Assign it to: Raw Material if it’s a raw material used in manufacturing.
- Assign it to: Trading if it’s a traded product.
How to Get into Item Groups
Go to:
A tree structure displaying all of the current item groups and subgroups is displayed here.

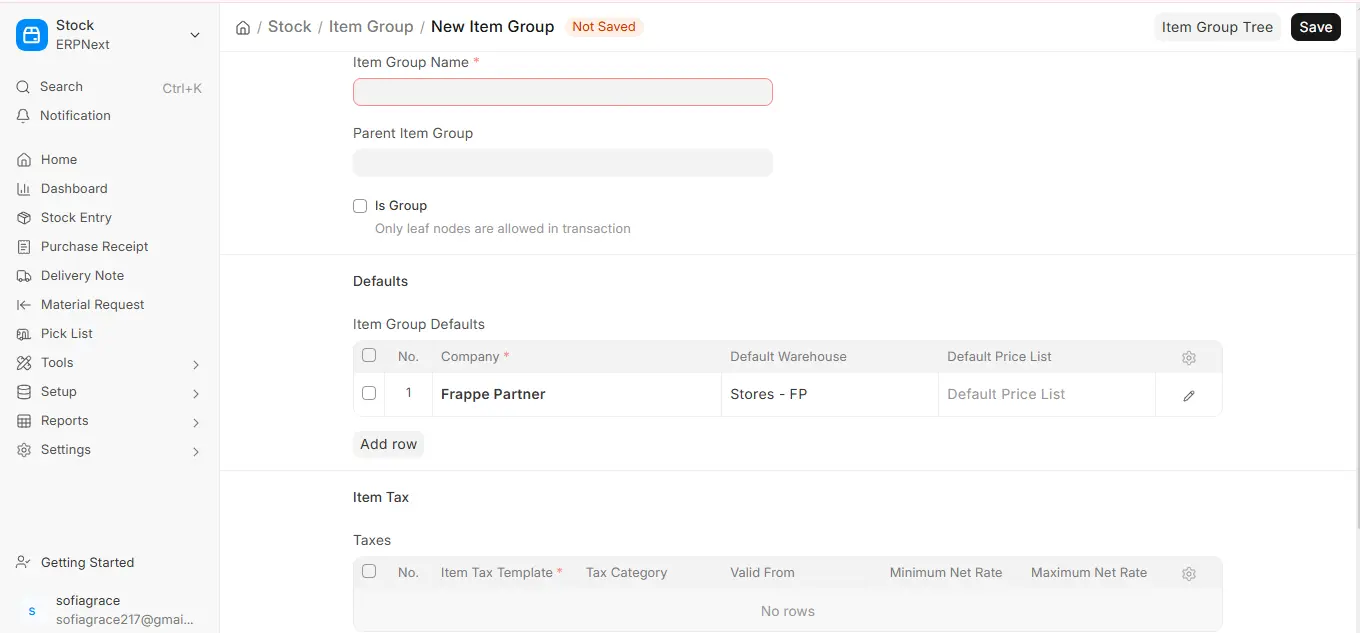
1. How to Form a New Group of Items
Add a new item group, follow these steps:
- Go to the list of Item Groups.
- In the upper right corner, click the “New” button.
- Select a Parent Item Group to add this new group to.
- “All Item Groups” is the root group by default.
- Click “Add Child” under a parent group to create a subgroup, or simply fill out the form and designate a parent.
- Check the “Is Group” box if the group you’re creating is only a category and not for transactions.
- This implies that while you can make additional groups under it, you cannot directly assign objects to it.
- To create the new group, click “Save.”
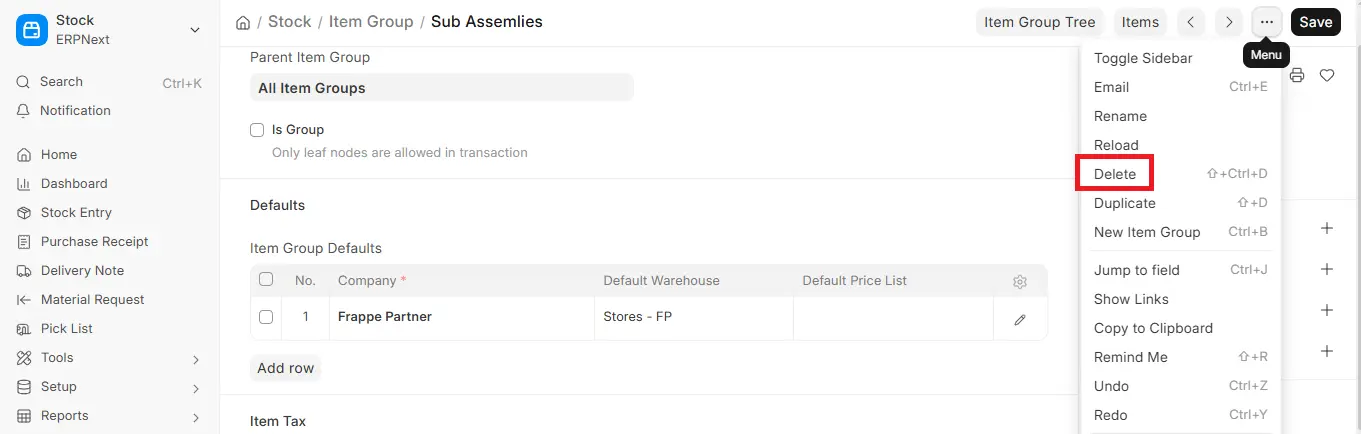
1.2 How to Delete a Item Group
If a group is no longer necessary:
- Open the group you want to delete
- Select the “Delete” button located at the top.
- Click “Yes” to confirm.
A group cannot be removed if it contains:
- Items assigned to it
- Child groups under it
2. Item Group Features
Once a group has been created, you can edit it to access a number of advanced settings.
2.1 Parent Item Group
- The parent group can be changed at any time.
- By doing this, you can rearrange your item group tree without erasing or creating anything.
For example: you can later change the parent of “Mobile Accessories” to “Electronics” if you accidentally created it under “All Item Groups.”
2.2 By default
You can specify default values in this section that will be applied automatically to each item in this group.
To add entries, click “Add Row.”
- Company (Required)
The company this group belongs to.
- The default warehouse
The warehouse that handles these items’ stock transactions.
- Default Price List
Price list to be applied in sales/purchase documents.
- Buying/Selling Cost Centre by Default
Used in accounts for purchase/sale of items in this group.
- Income/Expense Account Default
An expense account for purchases or an income account for sales.
- Default Supplier
Add the supplier’s name here if the items are typically purchased from them. Purchase documents will be automatically filled out.
2.3 Items tax
You can apply the group’s default tax settings to each item in this section.
To add tax rules, click “Add Row.”
- Required Item Tax Template
A pre-made template that includes GST, VAT, and other tax regulations.
- Tax Category
An optional category for designating tax groups (such as export or GST).
- Valid From Date
This tax will be applied from this date.
- Net Rate Minimum/Maximum
Used to regulate an item’s price range. helpful in preventing overpricing or selling below cost.

2.4 Configuring the Website
These settings are crucial if your system is linked to a website or online store:
- Display on the Website
To make this group and its contents visible on the website, tick this box.
- Weight
In the category list, the higher value is displayed first.
For instance, Group A (Weight 10) will appear first, followed by Group B (Weight 5).
As with individual products, you can include a banner slideshow for this item group.
- Slideshow
- Description
This description will appear on the website’s group page.
- Details of the Website
For this group, include labelled information.
Example: – Type | Value: Industrial Label
- Category: Electrical; Value: Electrical