Custom Field
Every form in ERPNext has a standard Custom Field that comes with it. But not all businesses have the same needs, so you may need to look for more information that isn’t given by default. Custom Fields let you add to standard and custom DocTypes without changing the core code in these situations.
Custom Fields in ERPNext v16 make it easy and safe to change forms to fit the needs of your business. People often use them to keep track of extra attributes, custom reports, workflows, internal references, and regulatory data.
You can use the built-in customization tools to add a Custom Field to any Form or Document Type (DocType).
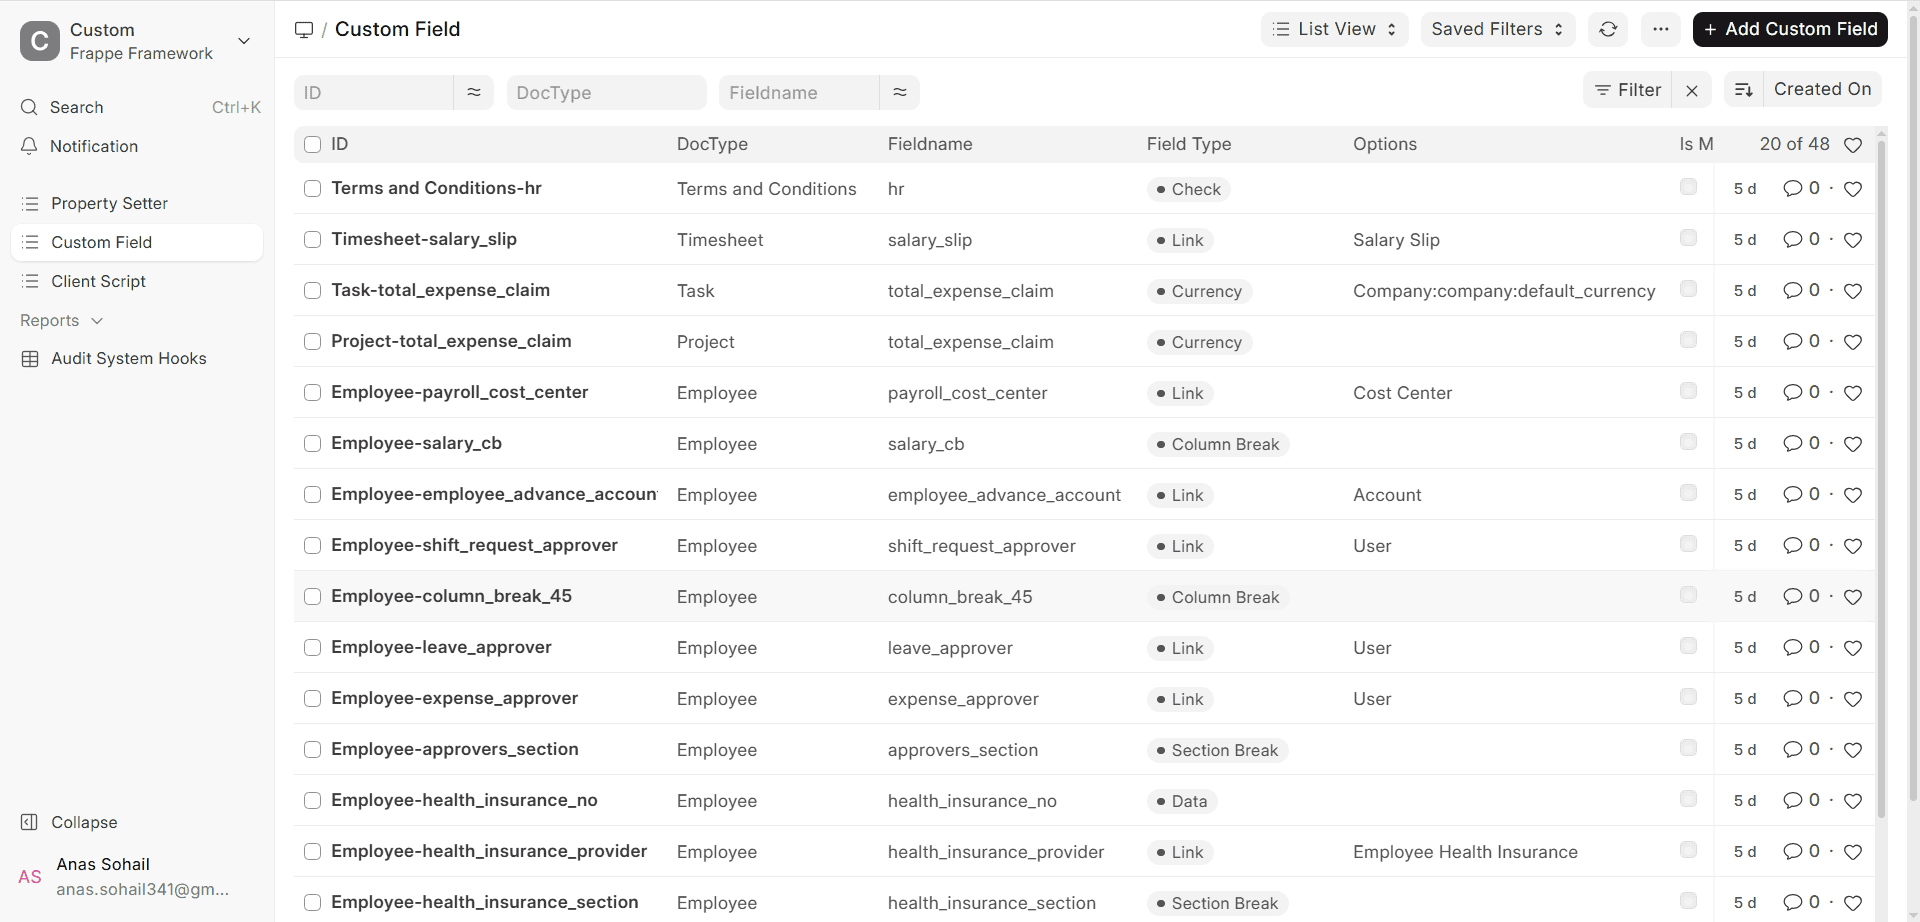
To get to Custom Field, follow these steps:
Home > Customization > Form Customization > Custom Field
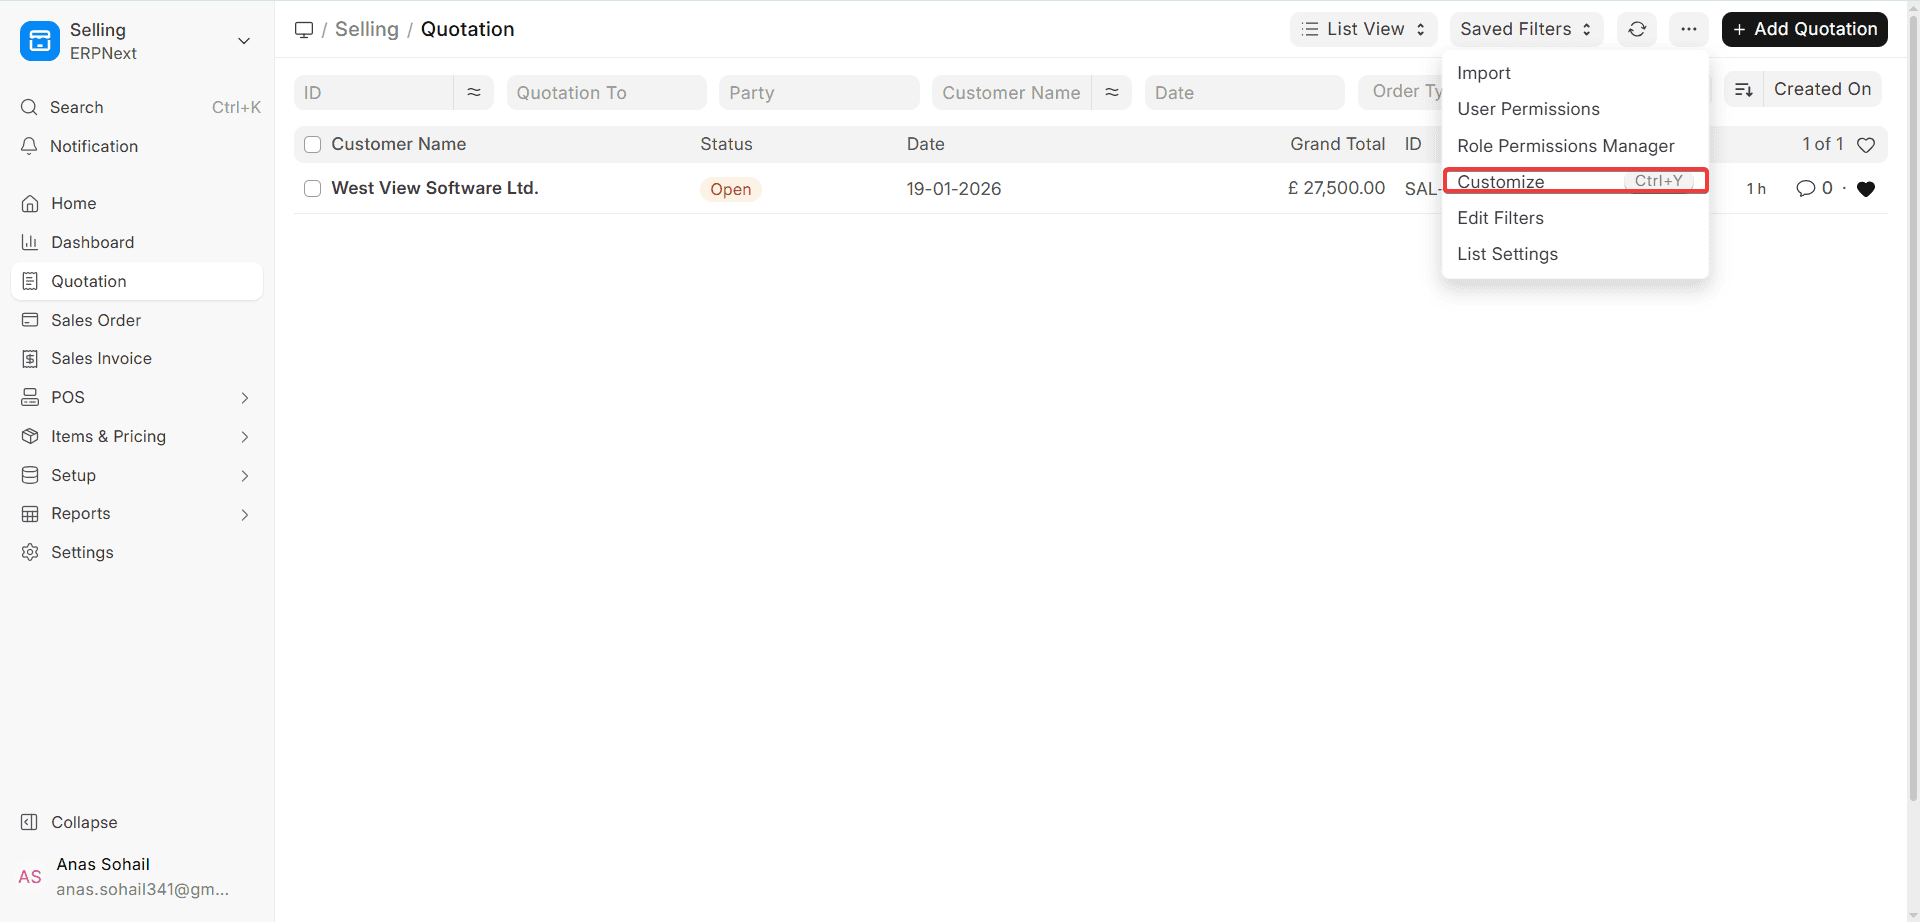
You can also change the fields for a DocType by going to its List View and clicking “Customize” in the menu.
How to make a field that is just for you
To add a new Custom Field, follow these steps:
1. In the list of Custom Fields, click New.
2. Choose the Document field that has the DocType you want to add the Custom Field to. This tells you where the field will be and which records will keep its value.
3. Fill in the Label, which is the name that will appear on the form. This label tells ERPNext what to call the internal field.
4. Pick the kind of field. There are many types of fields in ERPNext, such as Data, Select, Link, Date, Check, Currency, Table, and more. The kind of field you pick changes how it works, how it saves data, and how scripts, filters, and reports can use it.
5. Click Update (or Save) to use the Custom Field on the chosen DocType.
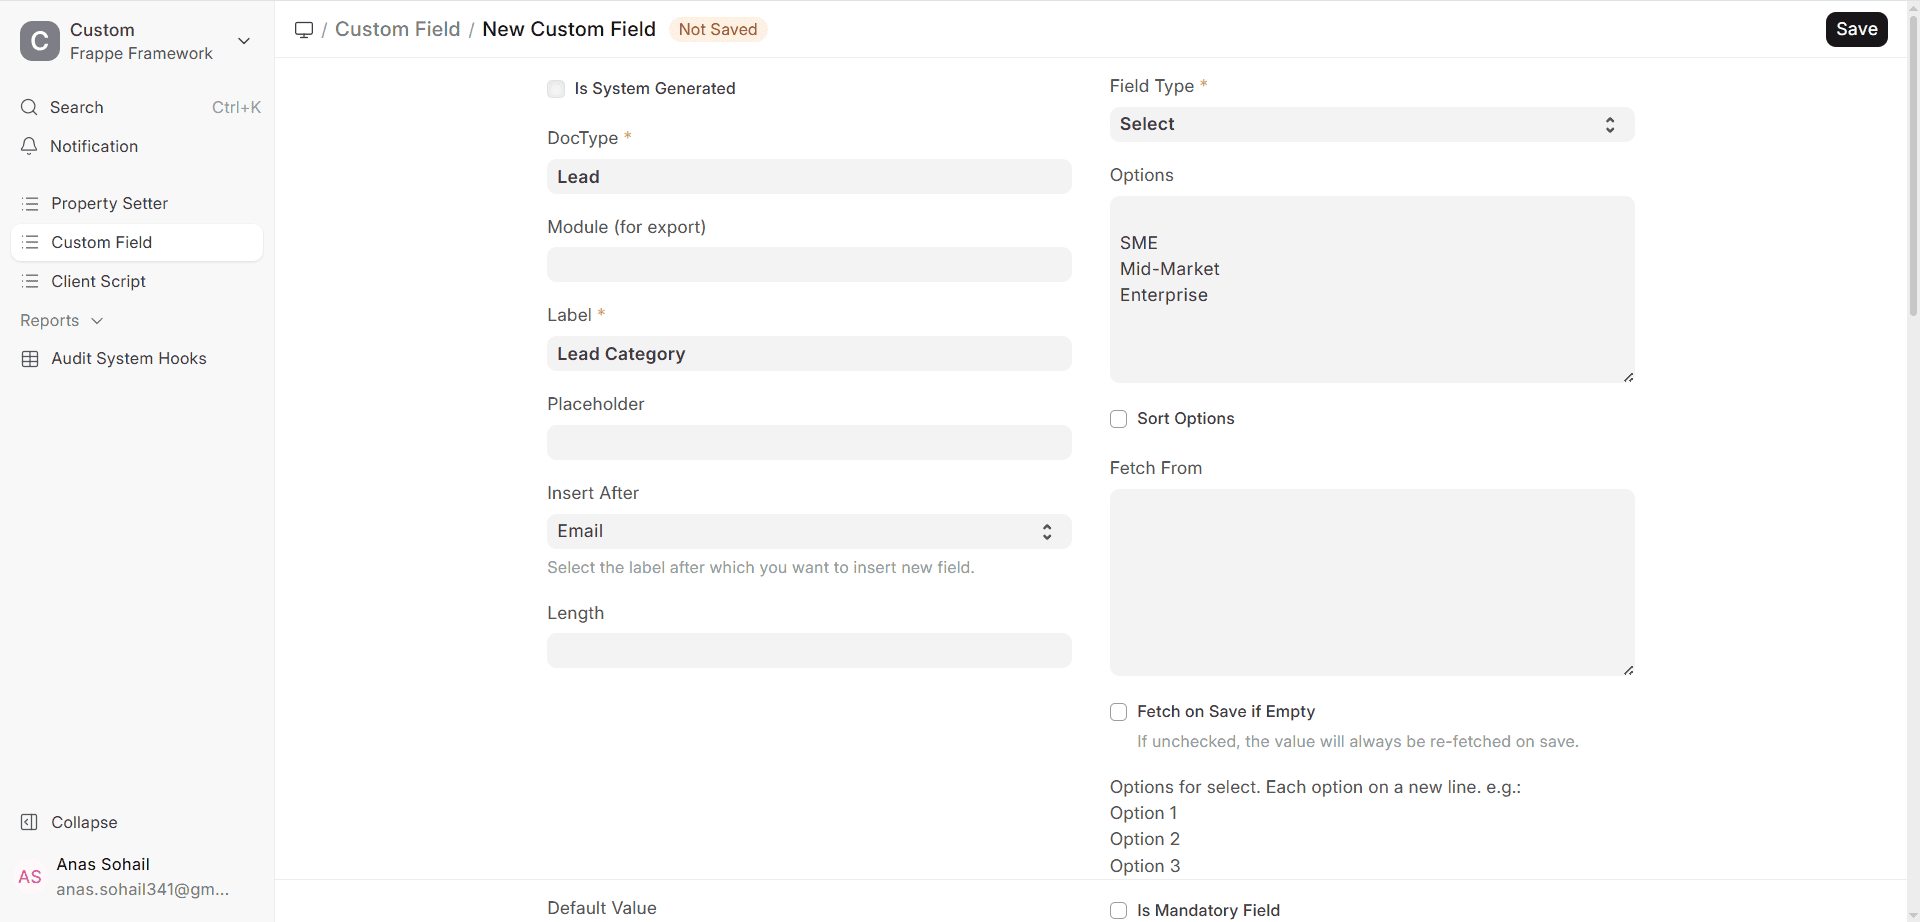
You can use the field right away after you save the form, and you can use it anywhere in the system.
Here are some of the most important options for a Custom Field:
- Field Type (Check, Link, Date, Data, Select, etc.)
- Value by default
- Setting that is either needed or not needed
- Behaviour that you can see but can’t change
- Conditions for being able to see (depends on the values in other fields)
- Adding with Insert After
- Access based on roles and permissions
- Getting values from linked documents
With Customize Form, you can also add, change, move, or delete fields in a certain form.
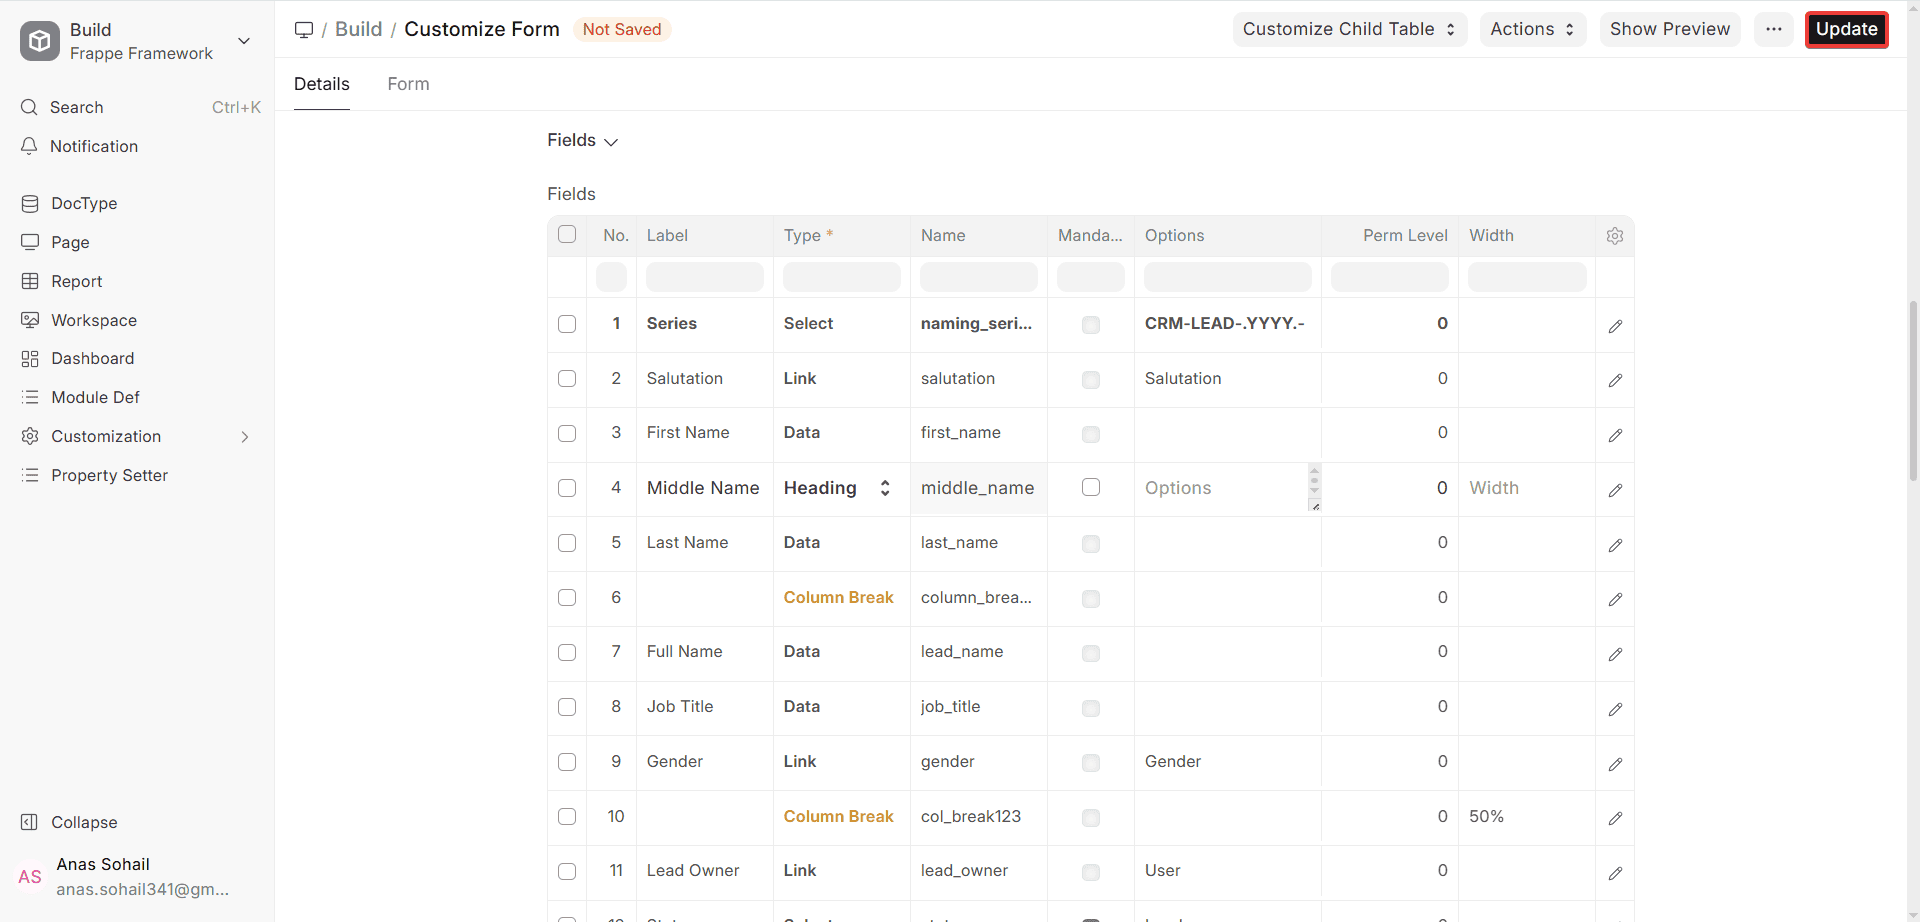
With Customize Form, you can do these things:
- Put the Custom Field in a different place.
- Show or hide fields based on roles
- You can change the properties of fields, such as making them required, read-only, or giving them default values.
- You can get rid of Custom Fields if you don’t need them anymore. If you want to, you can delete the data.
More information about ERPNext v16:
- When the system is updated, it keeps custom fields.
- You can use them in notifications, scripts, reports, print formats, and workflows.
- Regular fields and custom fields that are added to child tables work the same way.
- When you delete a Custom Field, the data that is already there will stay there unless you tell it to go away.
1.1. More Details
You have more control over how a Custom Field works, looks, and interacts with other fields and documents in ERPNext v16. These choices help keep the data consistent, improve the user experience, and make sure that business standards are met.
1. Options: If the Field Type you chose has a list of choices already set up, use this field to set the values that are allowed.
Options are most often used in ERPNext v16 for:
- Pick fields (one choice per line)
- Link fields (to pick the DocType you want to connect to)
- Table fields (to choose the DocType for the child table)
You can set values like these if the Field Type is Select:
- Open
- In Progress
- Done

This makes sure that users can only choose from the set values, which keeps the data correct and consistent.
2. Fetch From: The Fetch From feature lets you automatically pull data from a linked document into the Custom Field.
This choice is often used with Link fields and looks like this:
- field_name of link_field_name.field_name
For instance: If you create a Custom Field Project in the Item DocType,
- Change the field type to Link.
- Make Options a Project
- You can use Fetch From to get a certain field from the Project that goes with it. For example, you can get project_name.
This makes sure that the linked page automatically puts the right information in the Custom Field.
3. Fetch If Empty: If this box is checked, the system will only get data if the field is empty.
- The Fetch From logic won’t change the value in the field if there is already one there.
- This is useful if users have to type in or change values by hand after the first fetch.
For instance: If a fetched value is automatically filled in when a new item is made but then changed by a user, turning on “Fetch If Empty” will stop future automated updates from replacing what the user entered.
4. Default Value: When you make a new document, the Default Value is the value that is set automatically.
In ERPNext v16, these are the default values:
- Words that don’t change, like “Pending”
- Dynamic values that use system variables, like “Now” and “Today.”
- There are expressions in some types of fields.
Default values make it less likely that you will have to type in information by hand and make sure that all records are the same.
5. Depends On: The Depends On property determines whether or not the Custom Field is displayed based on certain conditions.
You can use the following to make rules:
- Names of fields (true or false)
- Like Python expressions
- Use either formulas or JavaScript expressions, depending on the situation.
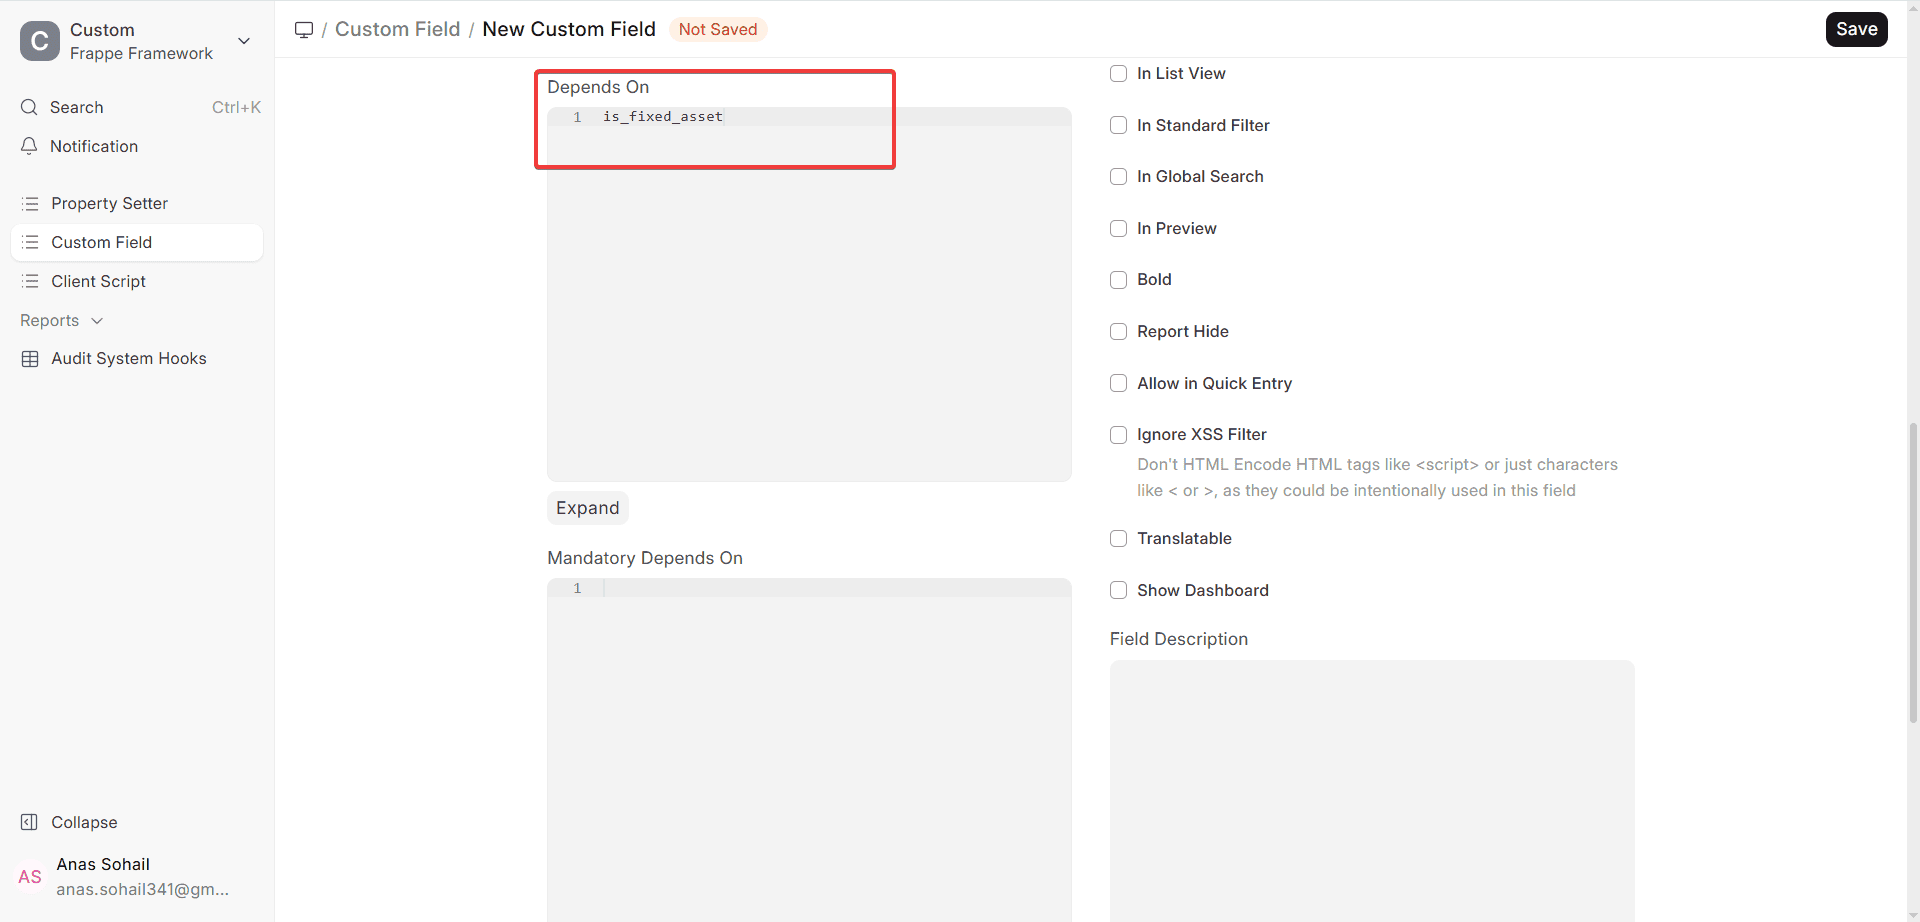
The “Asset Category” and “Asset Naming Series” fields will only be visible in the Item DocType if you choose “Is Fixed Asset.”
The need for reliance would be:
is a permanent asset
This makes forms easier to read by only showing fields when they are needed.
6. Field Description: You can type a description of this field here. It will be below the Custom Field on the form.
Field descriptions are useful for:
- How to use it
- Telling people how business works
- Making it clear what types of information are needed
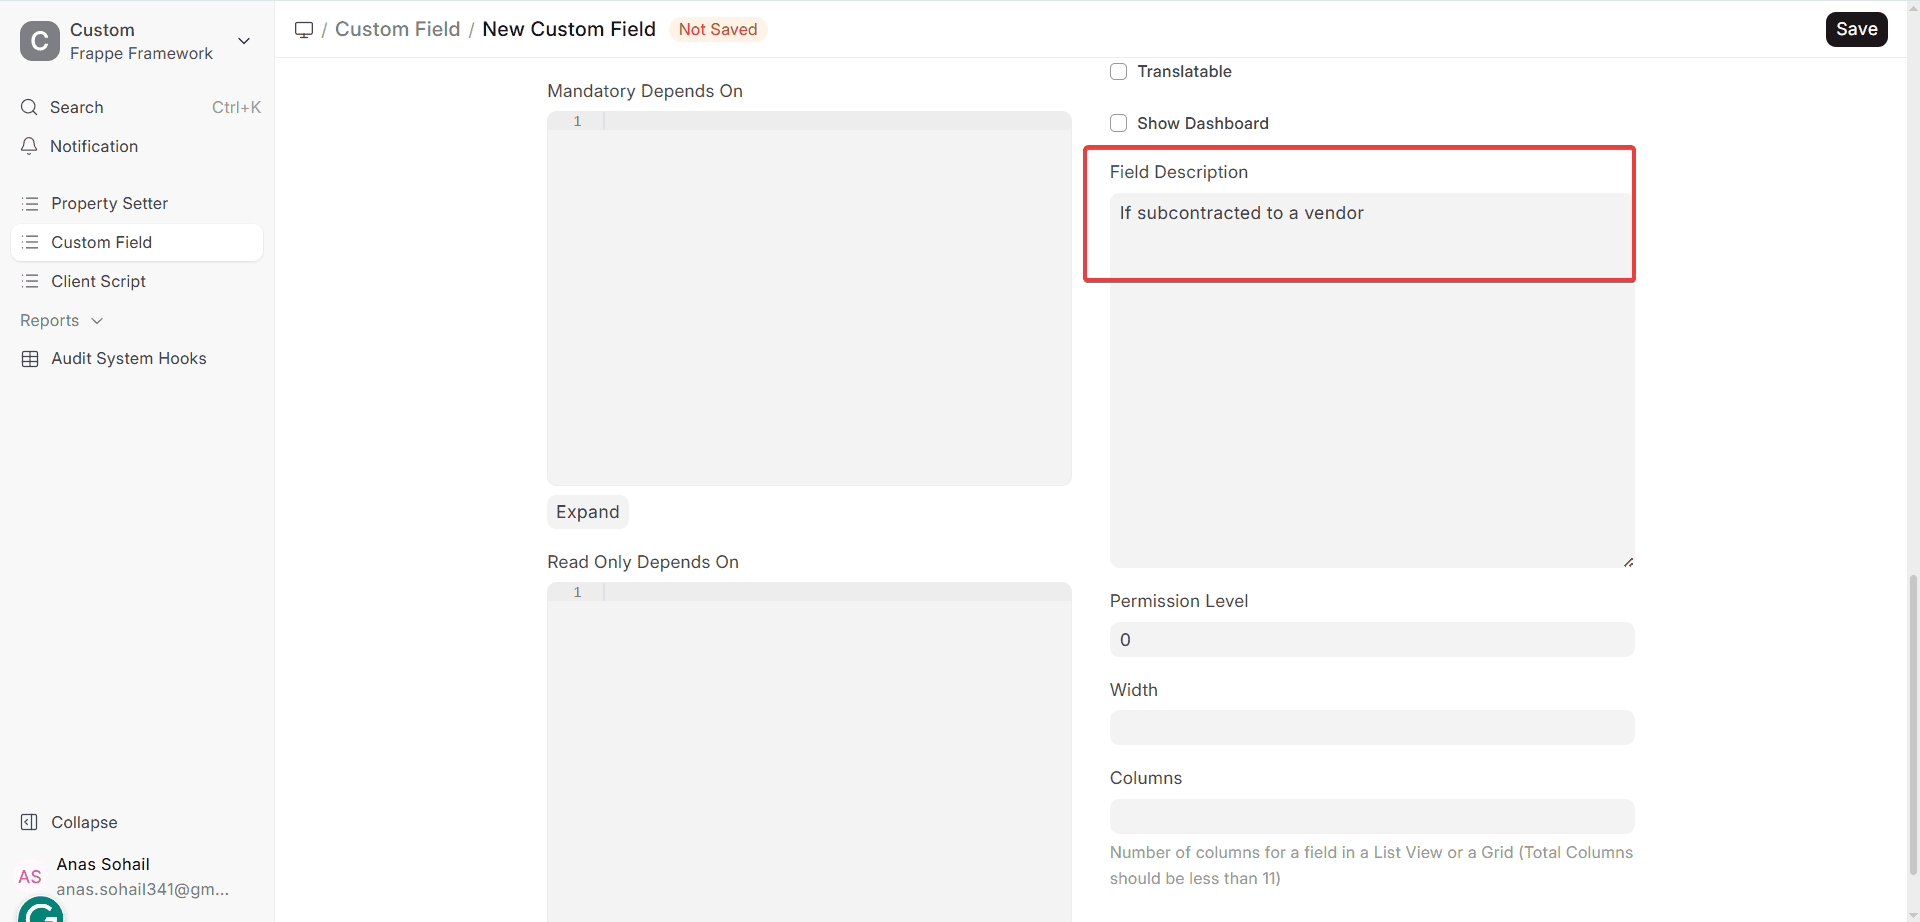
In ERPNext v16, anyone who can see the field can also see the descriptions that have been written.
7. Permission Level: You can set the Permission Level to choose who can see or change the Custom Field.
- Some things can only be seen by people who have higher permission levels.
- This works with the DocType’s existing Role-Based Permissions.
For instance: You could let regular users see a field but not let Managers or System Managers change it. People often use this to send private or approval-related messages.
8. In Preview: Popup for the DocType is on, checking In Preview adds this Custom Field to the hover preview popup.
This pop-up appears:
- When you hover your mouse over document links in List View,
- In every Link field in the system
Adding important fields to the preview makes it easier to find your way around and means you don’t have to open whole documents as often.
9. Width: The Width property tells the Grid View (child table) how much space the Custom Field takes up when it is shown.
- The width is measured in pixels.
- This setup makes tables easier to read and look better.
- This is very important for tables that have long IDs, numbers, or text in them.
Custom Fields in ERPNext v16 work almost exactly like regular fields now that they have these new features. This lets you make big changes without putting the system in danger.
1.2. More options
The following features will help you learn more about how to view, check, and use a Custom Field in ERPNext v16. These settings let you choose how the system enters, displays, searches for, prints, and protects data.
Required Field: If this field needs to have a value in it before the document can be saved or sent, turn this on. In ERPNext v16, validation that has to happen works on the server and the UI. This means that even when updates happen in the background or through the API, the data stays safe.
When this option is turned on, ERPNext makes sure that each document of the DocType has a different value for this field. People often use this for fields that need reference codes, compliance information, or ID numbers.
For instance:
- Code for Things
- GST Number for Customers
- Identification for Employees
If you enter a value that is already in the system, you won’t be able to save. It will show an error in the validation.
Just Read:
This means that users can’t change the field. Most of the time, the value is put in by:
- Get From
- Default Value
- Links or code
Read-only fields are usually used to show information that has been derived or referenced and shouldn’t be changed by hand.
Hidden: When this option is on, the field does not show up at all in the form UI.
Here are some common ways to use it:
- Turning off a field for a short time
- Putting away fields that are no longer needed
- Storing data that is only for the backend or integration
If they have the right permissions, scripts, reports, and filters can still use hidden fields.
Print Hide: This option makes the field invisible in Print Formats.
Use this when:
- The field is just for keeping track of what’s inside.
- Customers shouldn’t be able to read the documents.
- You can also conditionally hide fields in the Print Format to have more control.
If you check this box, the value of this field won’t be copied when you use the Duplicate or Amend tool to make a copy of a document.
This is useful for:
- Things to think about
- IDs that are unique
- Values that are only used once
Allow on Submit: This lets people change the field even after they have sent the document.
People often choose this option in ERPNext v16 for:
- Tracking information
- Things to remember after you send in your application
- What the system did to change things
Editing Value in Submitted Document has safety tips and best practices.
If you check this box in List View, the field will show up as a column in the List View of the DocType. This makes it easy to find important information and lets you quickly look through records without having to open each one.
- This makes the field a default filter in the List View filter section of the Standard Filter.
- It lets people quickly filter records without having to make a new filter every time.
- If you turn on Global Search, you might be able to find the value of the field in the Global Search bar.
This is very useful for:
- Numbers to look for
- IDs from other places
- Things that people usually want
The search could take longer if you let too many fields be searched all over the world.
Bold: This makes the value in the field stand out on the form. This is basically a way to make important or necessary information stand out more visually.
Hide Report: If this box is checked, the field won’t show up in Report Builder or in any regular reports.
This is useful for:
- Places that are only for the company’s use
- Fields for temporary or system use
- Removing unnecessary data from reports
- Don’t use the XSS Filter because it lets the field save and show HTML data without removing tags.
This option could make the system open to cross-site scripting (XSS), so be careful when you use it. Only use it with inputs or content sources that you trust and can control. You can use the field label and values for Custom Translations if you turn this option on.
This is very helpful for:
- Deployments in more than one language
- Pick fields that the user can see.
- Apps that work in other languages
1.3 Name of the area
When you add a new Custom Field to ERPNext, the name of the field will automatically start with “custom_” (for example, “custom_project_code”).
This way of naming things makes it impossible for things to get mixed up with:
- Standard fields that are already there
- In the future, ERP systems will have new fields.Next updates
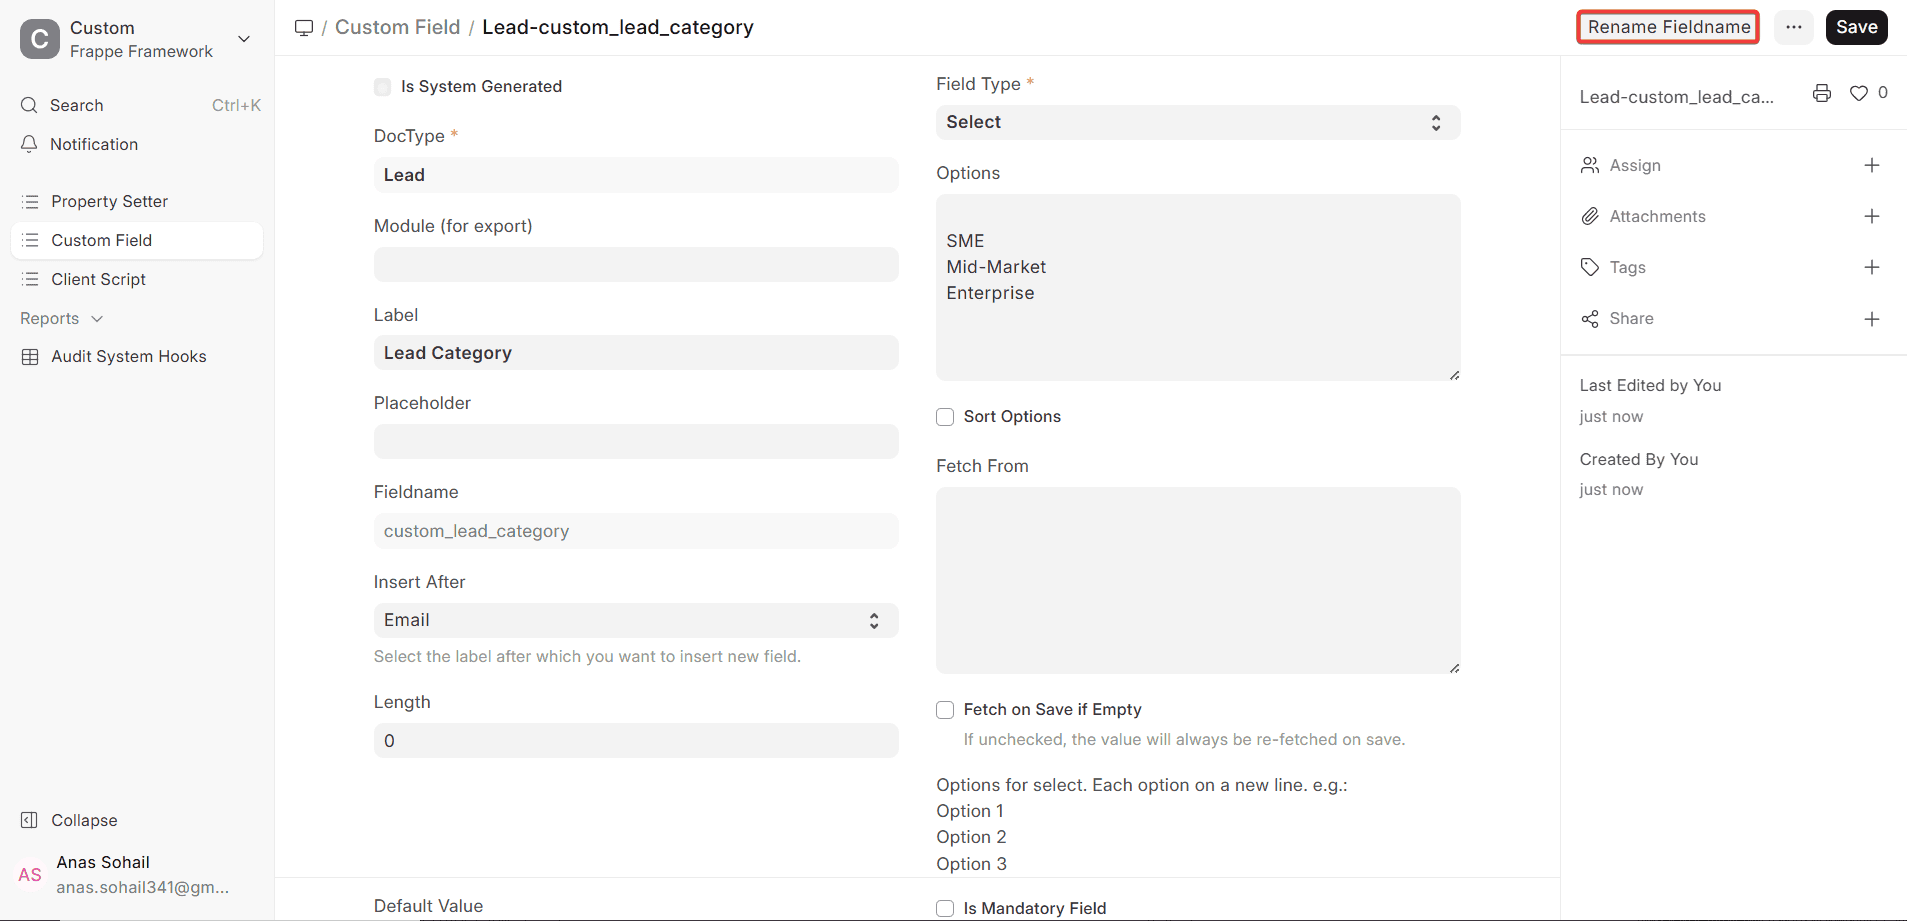
If you need a certain field name for your customization (for example, to make it work with older versions or other systems), you can change the name of an existing Custom Field.
- Open the Custom Field Document Type.
- Open the record for the Custom Field that you want.
- Click on “Rename Fieldname.”
- Type in the new name for the field and click “OK.”
Here are some things to keep in mind:
- When you change the name of a field, it changes right away in all the places where it is used.
- Don’t use names that might be confused with common fields.
- Be careful when you rename things in a production setting.