Shopify Integration
The Shopify integration in ERPNext v16 makes it easy to sync your ERPNext and Shopify stores. The Shopify Connector makes it easy to take orders from Shopify and turn them into Sales Orders in ERPNext. This makes sure that the sales, inventory, and accounting information on all systems is the same.
When you make Sales Orders from Shopify data, ERPNext checks to see if the Customer and Item entries are already there. ERPNext automatically creates a client or item if it doesn’t already exist by getting the customer’s name, email, item name, SKU, and price from Shopify. This makes it possible to process orders faster and without having to enter data by hand.
How do you set up the connector?
The ERPNext bundle no longer includes the Shopify Connector. Since ERPNext v16, it has become a separate Frappe App on the Frappe Cloud Marketplace. With this modular approach, it’s easy to maintain the integration up to date and running on its own.
This is a note for people who still use the old Shopify Connector.
You can skip ahead to the steps for a new installation if you haven’t already set up the Shopify Connector on your ERPNext site.
Before you can install the new app, you need to turn off the old Shopify integration that came with earlier versions of ERPNext. The system will automatically move any data that is already linked to Shopify, including unique product_id mappings for Items, into a new doctype after you install the new Shopify Connector app.
Once the setup is done, you can see how the migration is going by going to the Ecommerce Integration Log doctype. This log tells you how the data was synchronised, if the migration worked, and any problems that came up along the way.
Installing the App on Your Device
Depending on how your hosting is set up, there are several ways to deploy the Shopify Connector app:
- Frappe Cloud Hosting
You may instantly add the app to your ERPNext site if you host it on Frappe Cloud. You may get the Shopify Connector app from the Frappe Cloud Marketplace and install it with only one click.
- Frappe’s Hosted Sites
You will need to submit a support issue and ask Frappe to install the Shopify Connector app on your site if they host and maintain it.
- ERPNext on Your Own Server
You can use the Frappe bench tool to install the app if you host ERPNext yourself. To learn how to install Frappe apps, see the official bench documentation. This command will let you install the app:
Get the ecommerce_integrations app from the main branch of bench.
You can find the app’s source code on GitHub at http://github.com/frappe/ecommerce_integrations/.
Make a unique app with Shopify
You need to develop a Custom App in Shopify to protect your store. This software gives you the API keys and permissions you need to keep your data in sync.
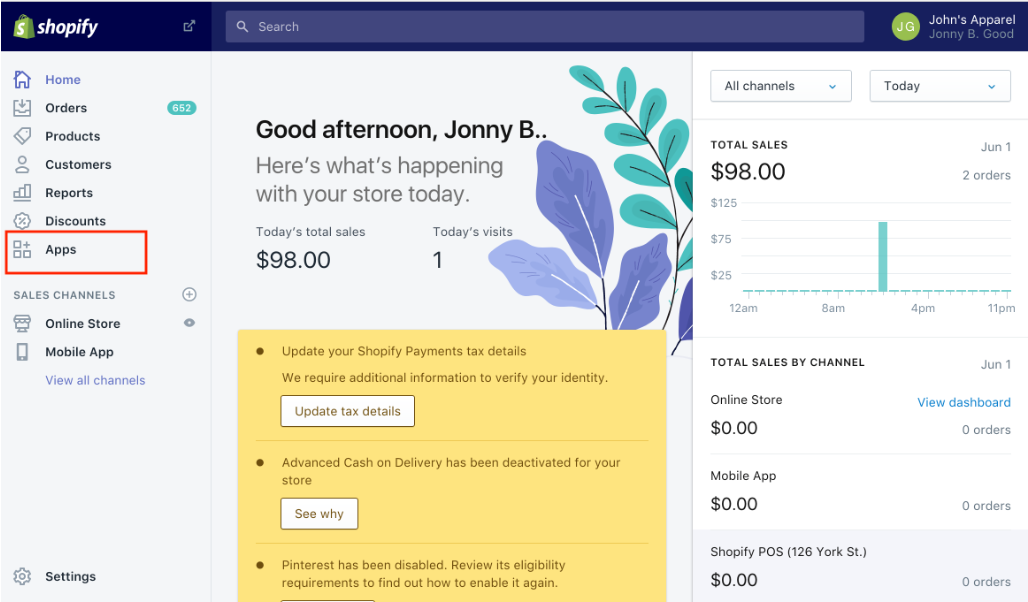
1. In the Shopify admin menu bar, click on Apps.
2. To make a custom app for your store, click on “Develop apps.”
3. Click on “Make New App.”
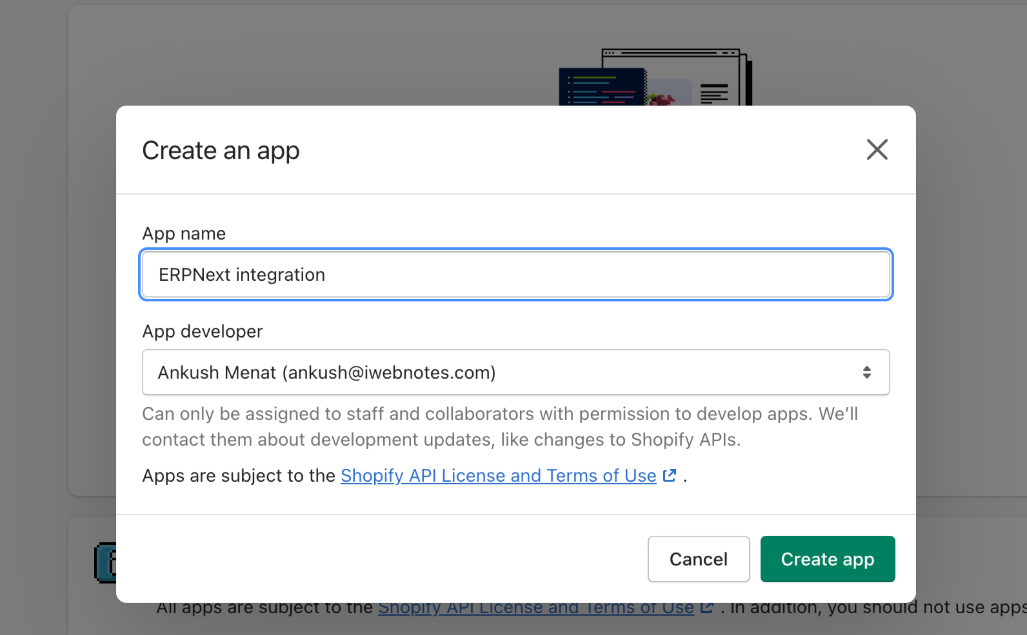
4. Enter the name of the app, the developer’s contact information, and other details, and then create the app.
To set up the connector in ERPNext for each custom app, you need the API Key, API Secret (Password), and Shared Secret.
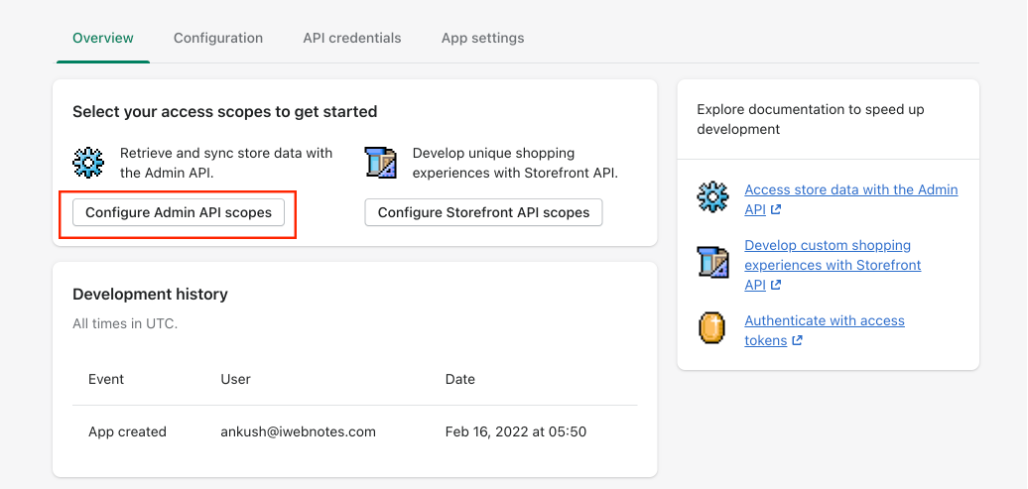
5. To make sure that Shopify and ERPNext are totally in sync, the app needs the following rights (Admin API scopes):
- Draft Orders: Read and Write
- Read and Write Orders
- Read Places
- Customers—Read
- Read and Write Orders That Need to Be Filled
- Things to Read and Write
- Lists of things to buy: Read and Write
- List of Things to Read and Write
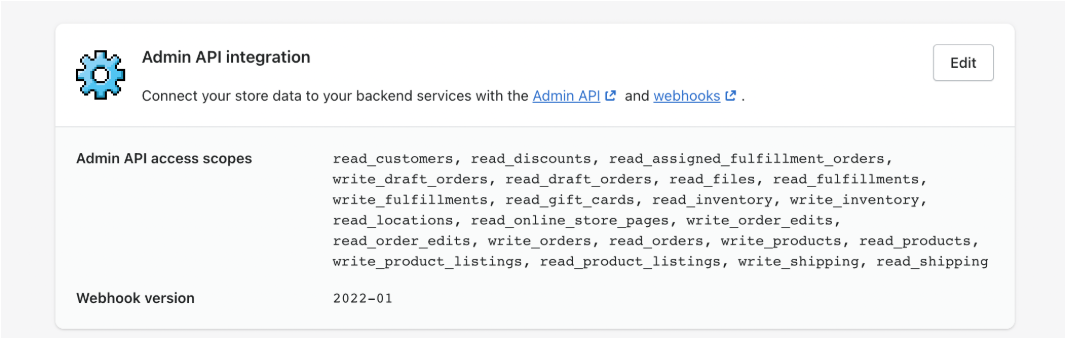
If you give these permissions, your final Admin Scopes setup should show all of the access privileges listed above.
6. Put the app in your Shopify store.
After the installation is done, copy the API keys that were made and use them to set up the ERPNext settings for the Shopify Connector.

You may automate order synchronisation, cut down on the number of mistakes made by hand, keep your inventory up to date in real time, and make sure that data moves smoothly between Shopify and ERPNext when you set up the Shopify Connector correctly in ERPNext v16.
How to Set Up Shopify and ERPNext v16 to Work Together
You need to set up the app credentials and other integration settings in ERPNext when you build a Private App on Shopify. This will make it easy for the two platforms to share orders, inventories, and items.
To go to Shopify Settings in ERPNext, click on the Awesome Search Bar and then on Shopify Setting.
1. Enter your Shopify login information
Enter the information for your Shopify Private App in the Shopify Settings form:
- Shopify Site URL: This is the URL of your Shopify store.
- The Shopify Private App makes this access token, which lets ERPNext get to your store’s data safely.
- API Secret: This is what you use to check API requests and make sure that ERPNext and Shopify can talk to each other safely.

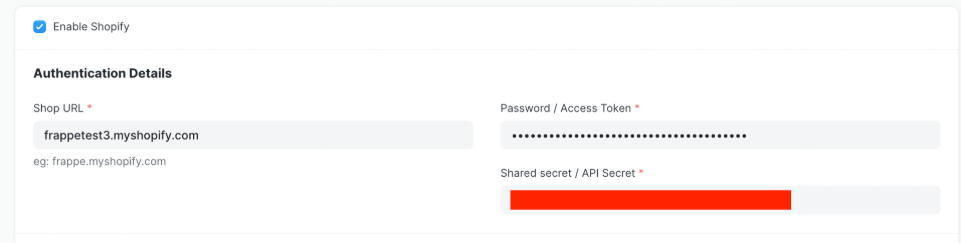
These credentials let ERPNext connect to Shopify’s APIs and start obtaining orders, customers, and items.
2. Set up the settings for enterprises, consumers, and stock
Set up the following:
- Link customer records in ERPNext to customers in Shopify for customer mapping. The system can either automatically add new clients or connect them to records that are already there.
- Firm: Choose the ERPNext company that will handle orders from Shopify.
- Inventory Accounts: Select the process by which ERPNext will trace the stock movements related to orders placed with the help of Shopify.
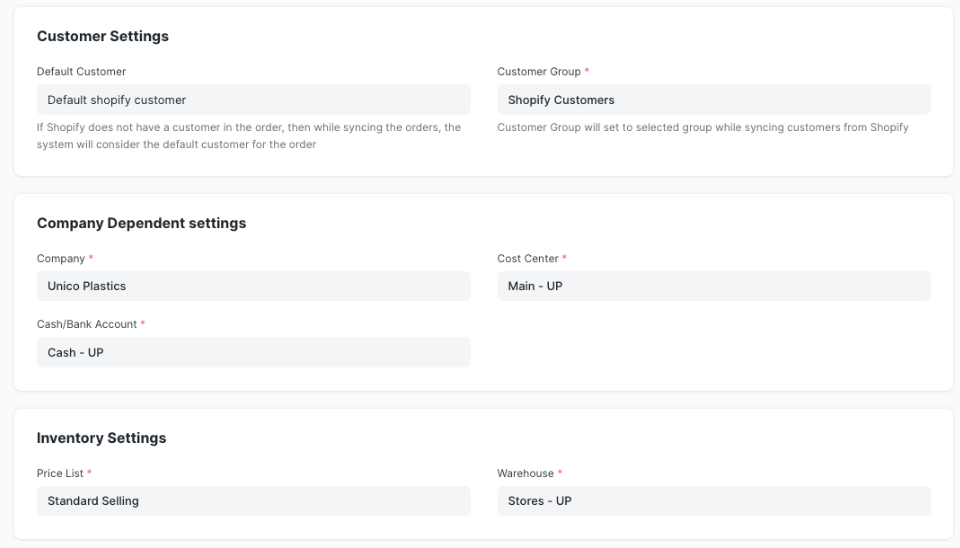
These environments ensure that the Shopify orders are monitored properly and stock maintained.
3. Set up the sync settings
ERPNext with Shopify You can generate Sales Orders in ERPNext automatically by receiving orders automatically through Shopify. You also may instruct the system to track payments and deliveries of some orders:
- Make a decision on whether or not the payments should be automatically connected to ERPNext Payment Entries.
- Prepare the display of ERPNext Delivery Notes in the way Shopify orders are received.
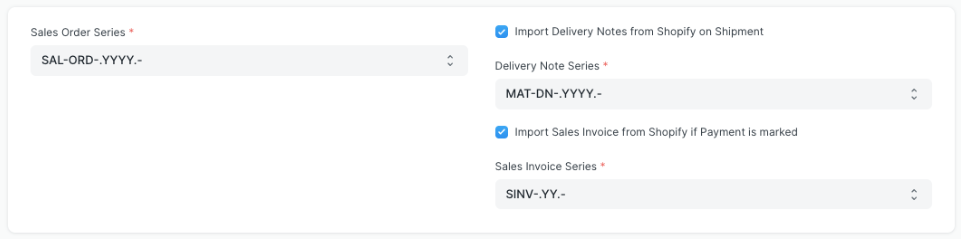
This ensures that the entire process of transferring orders in Shopify to ERPNext is automatically transferred.
4. Prepare the Tax Mapper
Shopify has its tax and delivery regulations. In order to make this work with ERPNext:
- Match every Shopify tax and shipping cost with the corresponding ERPNext tax template or account head.
- The names of your taxes are displayed on the Shopify Admin panel.
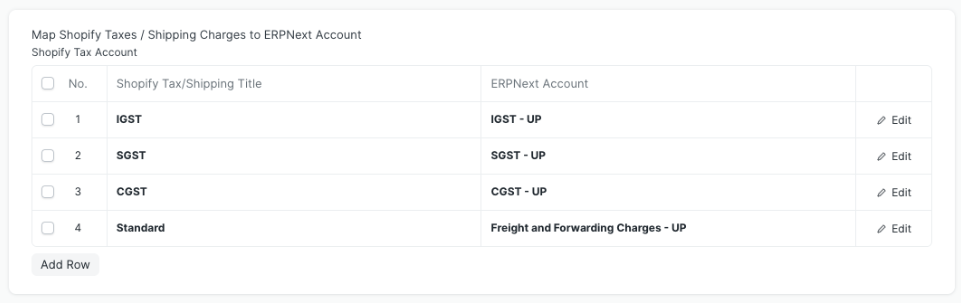
This ensures that the reporting and the taxes are accurate as orders are entered into ERPNext.
When you’re done, save your work and turn on Shopify Sync. After that, ERPNext will register APIs with Shopify and start syncing orders on its own.
Getting old Shopify orders to match up
When you switch on Shopify connection, ERPNext helps you sync old orders from Shopify.
- Click on “Sync Old Shopify Orders.”
- Type in the From and To dates so that the orders can be synced.
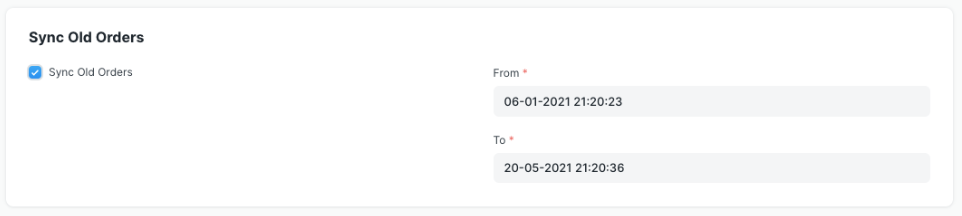
This process runs in the background and could take a few hours, depending on how many orders are in Shopify. When you place historical orders in ERPNext, they will be set up as Sales Orders with the right ties to customers, items, and taxes.
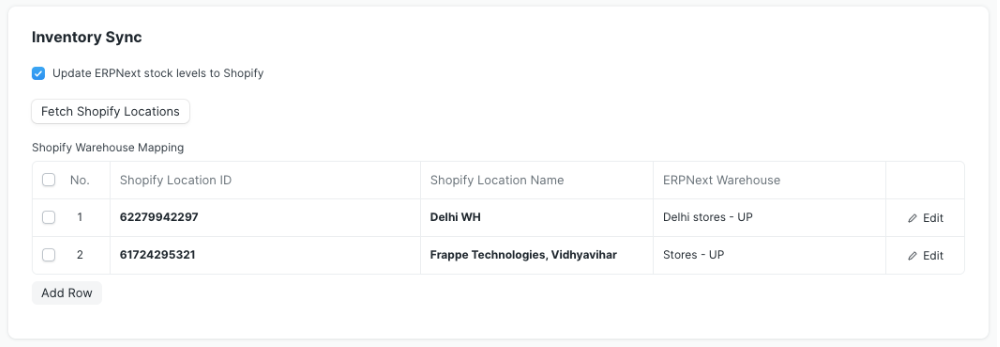
Synchronizing Inventory
When you sync items from Shopify to ERPNext, it can automatically update Shopify with the current stock levels. An inventory sync operation usually runs on a specified schedule every hour.
- Check the box to turn on Inventory Sync. This will open a table that shows you how to connect Shopify Location to ERPNext Warehouse.
- You can set how often you want to sync (every 30 to 60 minutes is best).
- To add Shopify locations to the table, click “Fetch Shopify Locations.”
- Connect each Shopify store to the correct ERPNext storage area.
- Keep the settings.
Notes:
- People think that ERPNext is the greatest location to get information about stock. If the levels of inventory are different, ERPNext will undo any changes made directly in Shopify.
- Shopify doesn’t let you utilise fractional amounts. If you sync an ERPNext item with fractional stock to Shopify, the number will be rounded down.
Things to Sync
- You can use ERPNext to send new items and changes to Shopify.
- To automatically add items to Shopify, tick the box next to “Upload new ERPNext items to Shopify.”
- You can sync changes you make to ERPNext, like prices, descriptions, and stock levels, with Shopify.
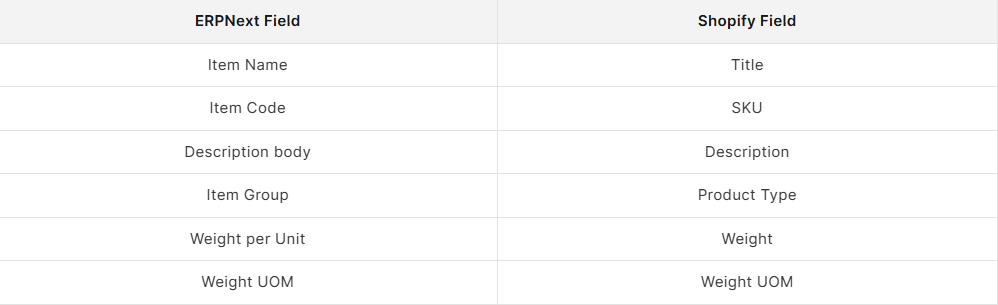
The following fields were synced:
Notes:
- By default, everything that are uploaded to Shopify are marked as Draft. You can publish them by hand in Shopify later.
- ERPNext links all the items together, so there are no duplicates.
- You can’t use this functionality with products that include variants or templates, or when you import data.
How to Cancel Orders
If you cancel a purchase on Shopify, ERPNext performs this:
- If you cancel a Shopify order and there is no Sales Invoice or Delivery Note for it, the ERPNext Sales Order will be cancelled right away.
- ERPNext keeps track of whether a Transaction has been cancelled, but it doesn’t automatically cancel any transactions that are tied to it, like an invoice or delivery note. Users have to cancel items and do other things by hand because of this information.
This setup makes sure that customers, orders, inventory, taxes, and goods are all in sync between ERPNext v16 and Shopify. This makes things go more smoothly and cuts down on the need for people to work.