Help Articles For ERPNext Part 7
Synchronize DocTypes with Events Calendar
To make Sales Order or Sales Invoice a calendar view or any other DocType, you have to follow the following steps (ERPNext v16):
1. Click on Calendar View List.
- Open the Awesome Bar by typing: Type “Calendar View List:
- It can also be accessed in v16, under: Settings → Customization → Calendar View List.
- In this section you can set up how the records in a particular DocType would be shown in a calendar format.
2. New Calendar View.
- Click on New to make a new Calendar View setup.
- Make sure that you are authorized (System Manager or customization access) to add or change entries.
3. Select Reference DocType
- Select the Reference DocType that you would wish to view on the calendar (i.e. Sales Order, Sales Invoice).
- All documents of this DocType that are submitted or saved will be considered when rendering the calendar.
4. Set up Start Date and End Date Fields.
- Select the Start Date Field and (optionally) End Date Field of the selected DocType.
For example:
- Sales Order→ Delivery Date as Start Date.
- In case an End Date is not given, the event will be considered a one-day entry.
- Make sure that the fields chosen are Date or Datetime.
5. Other Field Mapping (where necessary)
You can define:
- Name (e.g., Customer Name or Title) to name events.
- Color Field (selectable) to visually differentiate entries by status or category.
- They upgrade visualization, and it is possible to display multiple records in the calendar.
6. Save the Configuration
- Click Save to use the Calendar View settings.
- After saving, use the view selector to change to a Calendar View.
7. Verify Calendar Display
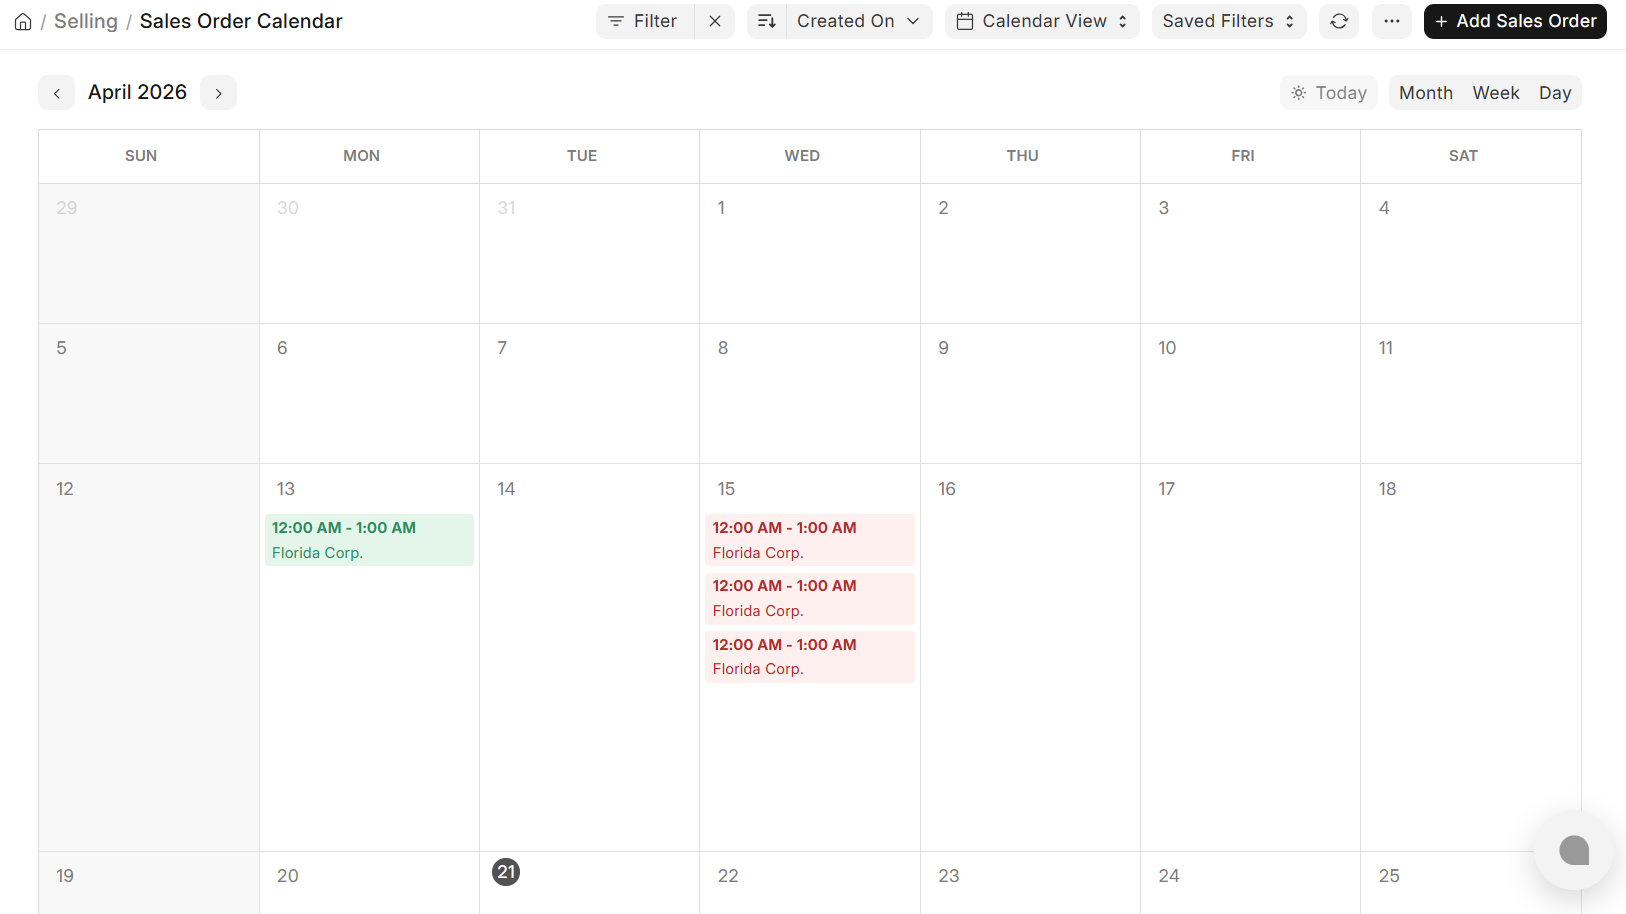
- Open the DocType (e.g., Sales Order) and set the Calendar View and ensure that the records are properly plotted according to the date fields set up.
- Filter or field mappings may be adjusted when the entries are not seen as desired.
User Permission based on Hierarchy
Question:
What to set up in User Permissions to allow an Employee to see his Expense Claims, and those of those who report to him/her?
Answer:
Hierarchical access in ERPNext v16 is handled with the Employee Master and the Reports To field, creating the reporting hierarchy that is utilized in HR records.
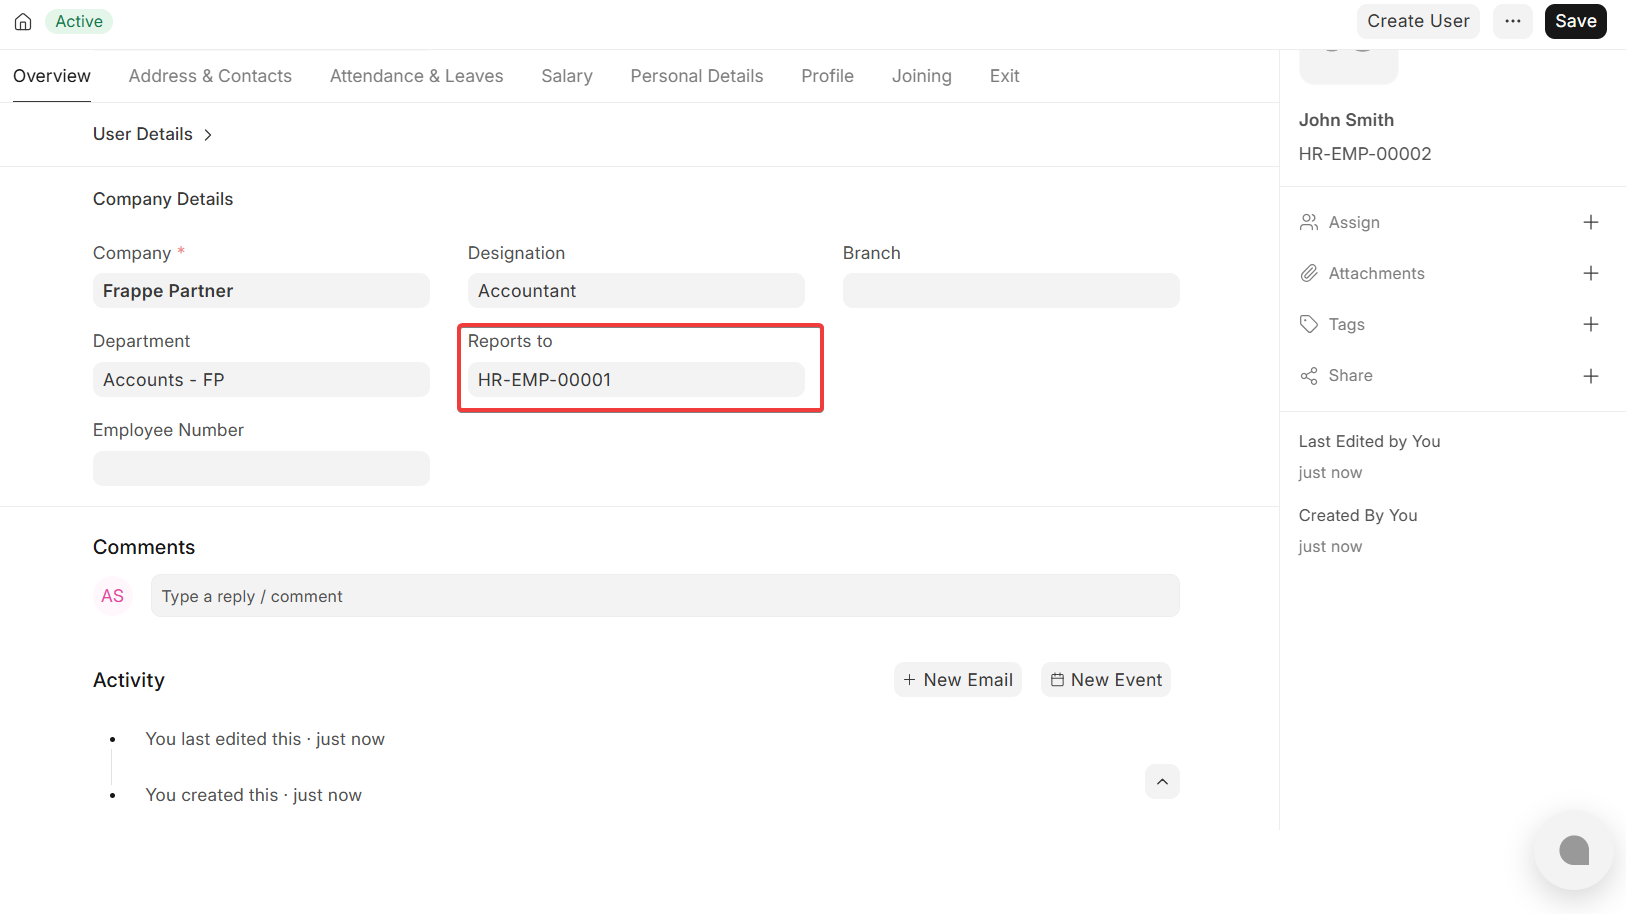
1. Define Reporting structure in Employee Master
- Assign the Reports To field of each employee in the Employee DocType.
- The employee ID of his or her immediate manager should be in this field.
Example:
- Employee A: Supervisor: Manager B.
- Manager B: Uses Report to Senior Manager C.
This forms a hierarchical hierarchy of employees as employed by ERPNext in access control and approvals.
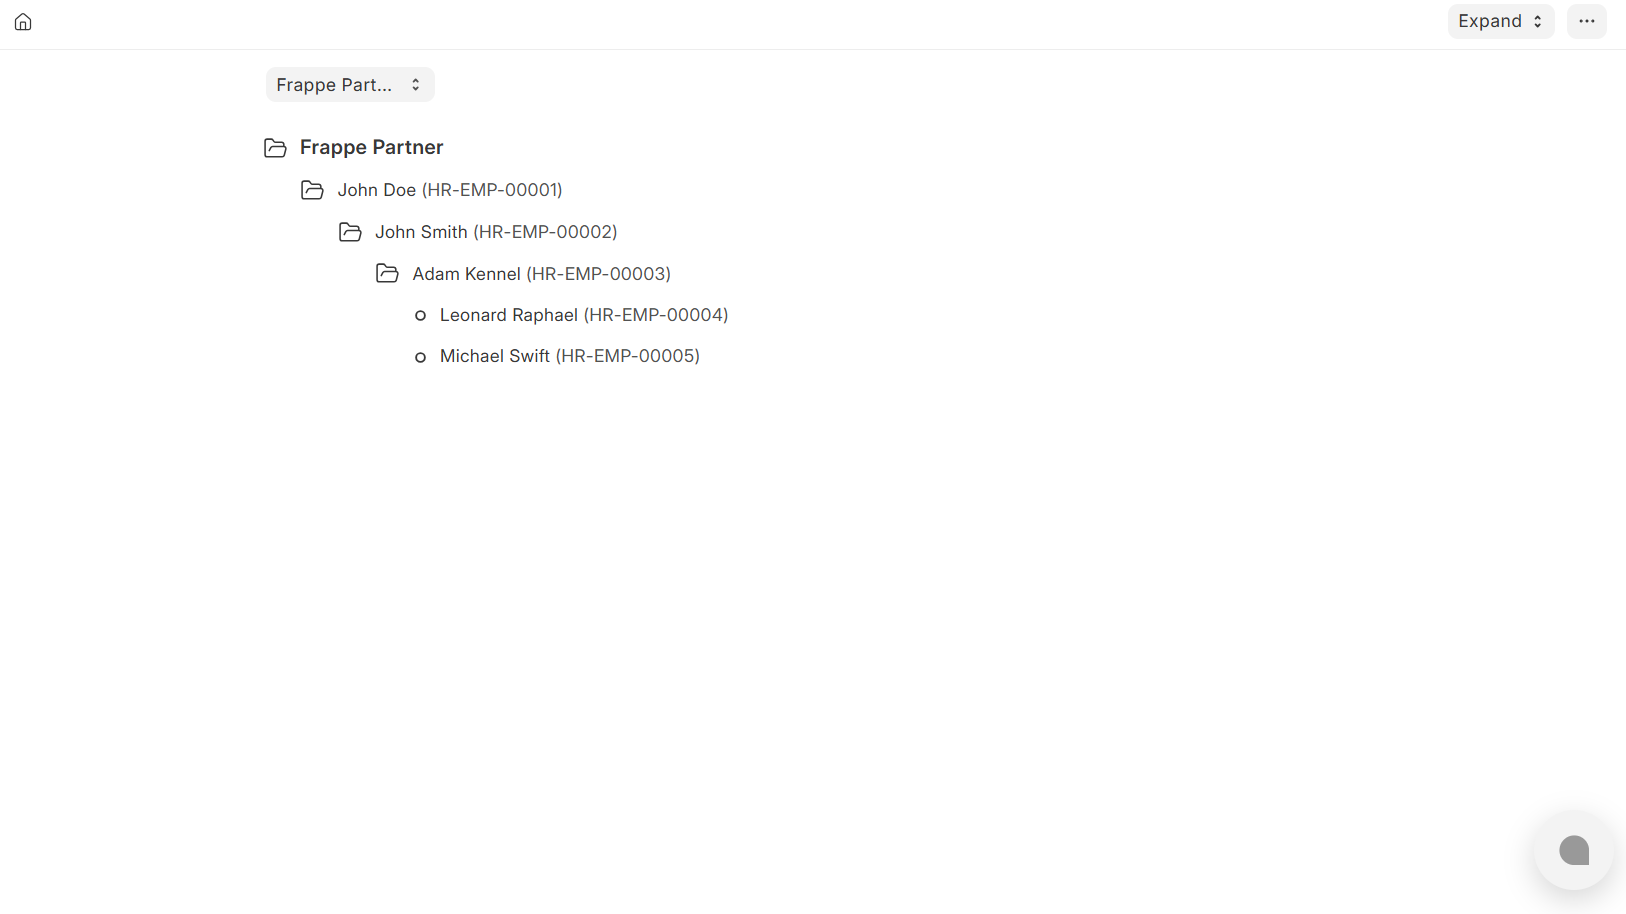
2. Employee Hierarchy Formation
- After the Reports To field is set up among employees, the ERPNext will automatically create the Employee Hierarchy Tree.
- HR modules use this hierarchy to decide the document visibility and approvals and access the workflow.
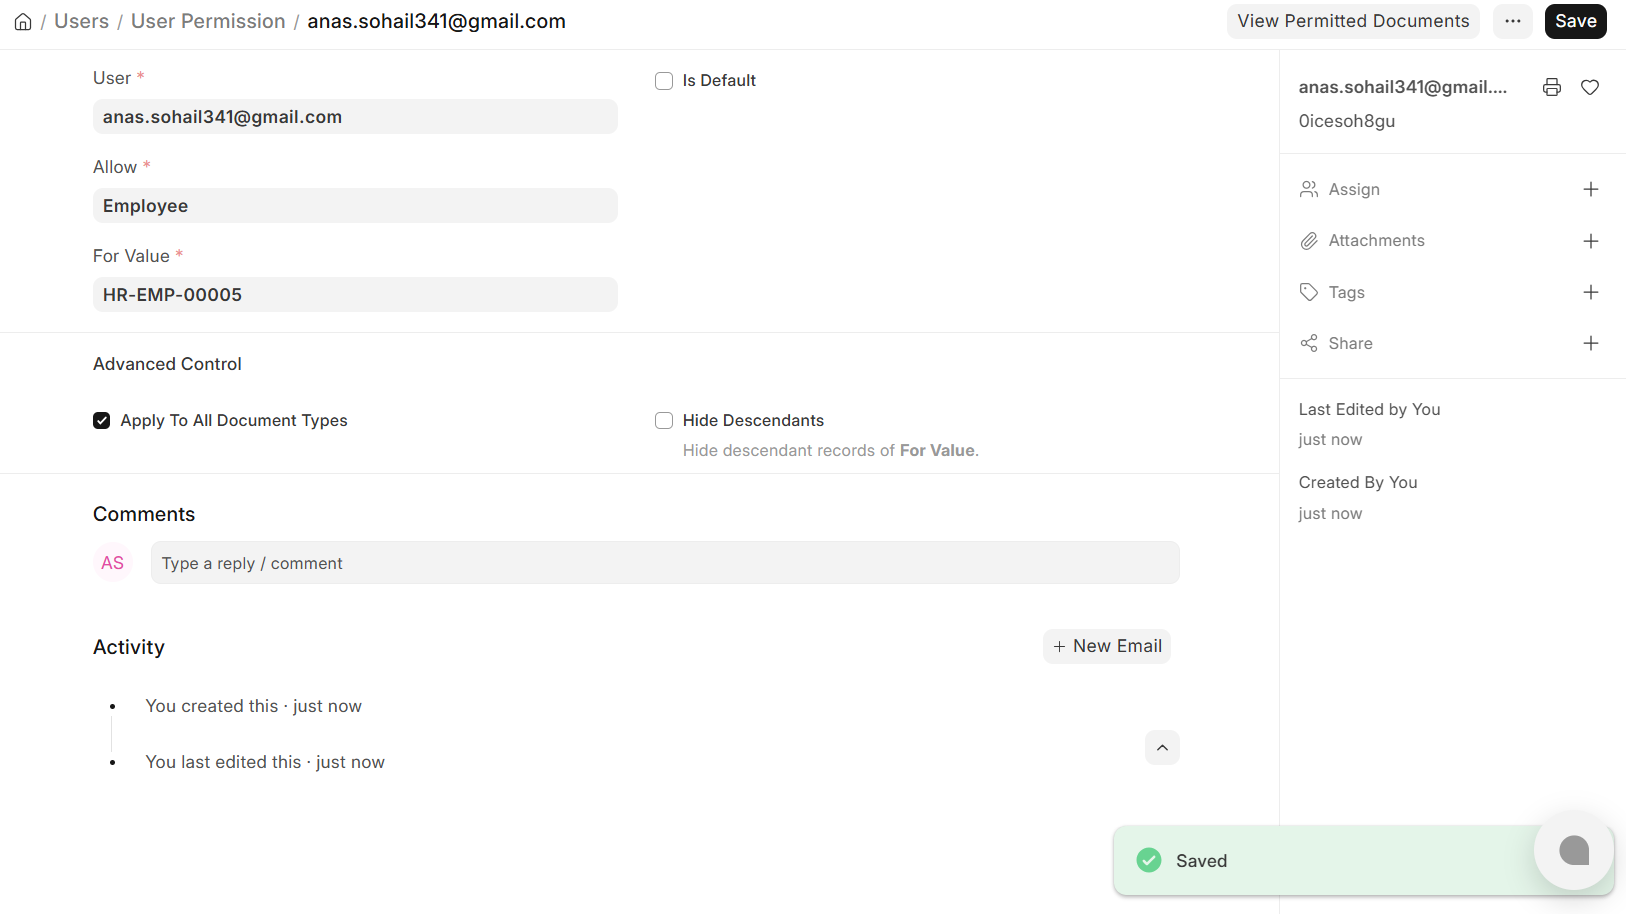
3. User Interconnecting Employee
- Make sure that every User has an Employee record in the User form.
- This mapping allows ERPNext to implement system user permissions based on employees.
The system automatically implements the Employee-based User Permissions without the need to create the rules manually once connected.
4. User Permission Behavior that is automatic
ERPNext automatically provides access to: when the User is associated with an Employee.
- Their HR records (Expense Claims, Leave Applications, Appraisals, etc.).
- Documents generated on employees who report to them (according to the Reports To hierarchy).
5. Example Scenario
In case Kenneth is configured as the manager in the Reports To field of a number of employees:
- All Expense Claims that come in as a result of reporting employees will be noted by Kenneth.
- Kenneth will still have access to his own Expense Claims.
This is true to other HR documents such as:
- Leave Application
- Appraisal
- Records of attendance (when turned on in workflows)
6. Important Configuration Check
Ensure that:
- The Reports To field is properly filled in with all the employees in the hierarchy.
- The hierarchy indicates the reality of organization structure.
- Every employee is well connected with a User account.
When set up properly, managers can automatically access documents of their subordinates without having to add further custom rules to the User Permission list.
Add/Remove Fields from Print Format
To illustrate, I wish to add the Supplier Name column and remove the column of “Stock UOM” under the item in the table, but adding Supplier Contact Name under Supplier Name to the Print Format with the following fields to a Purchase Order.
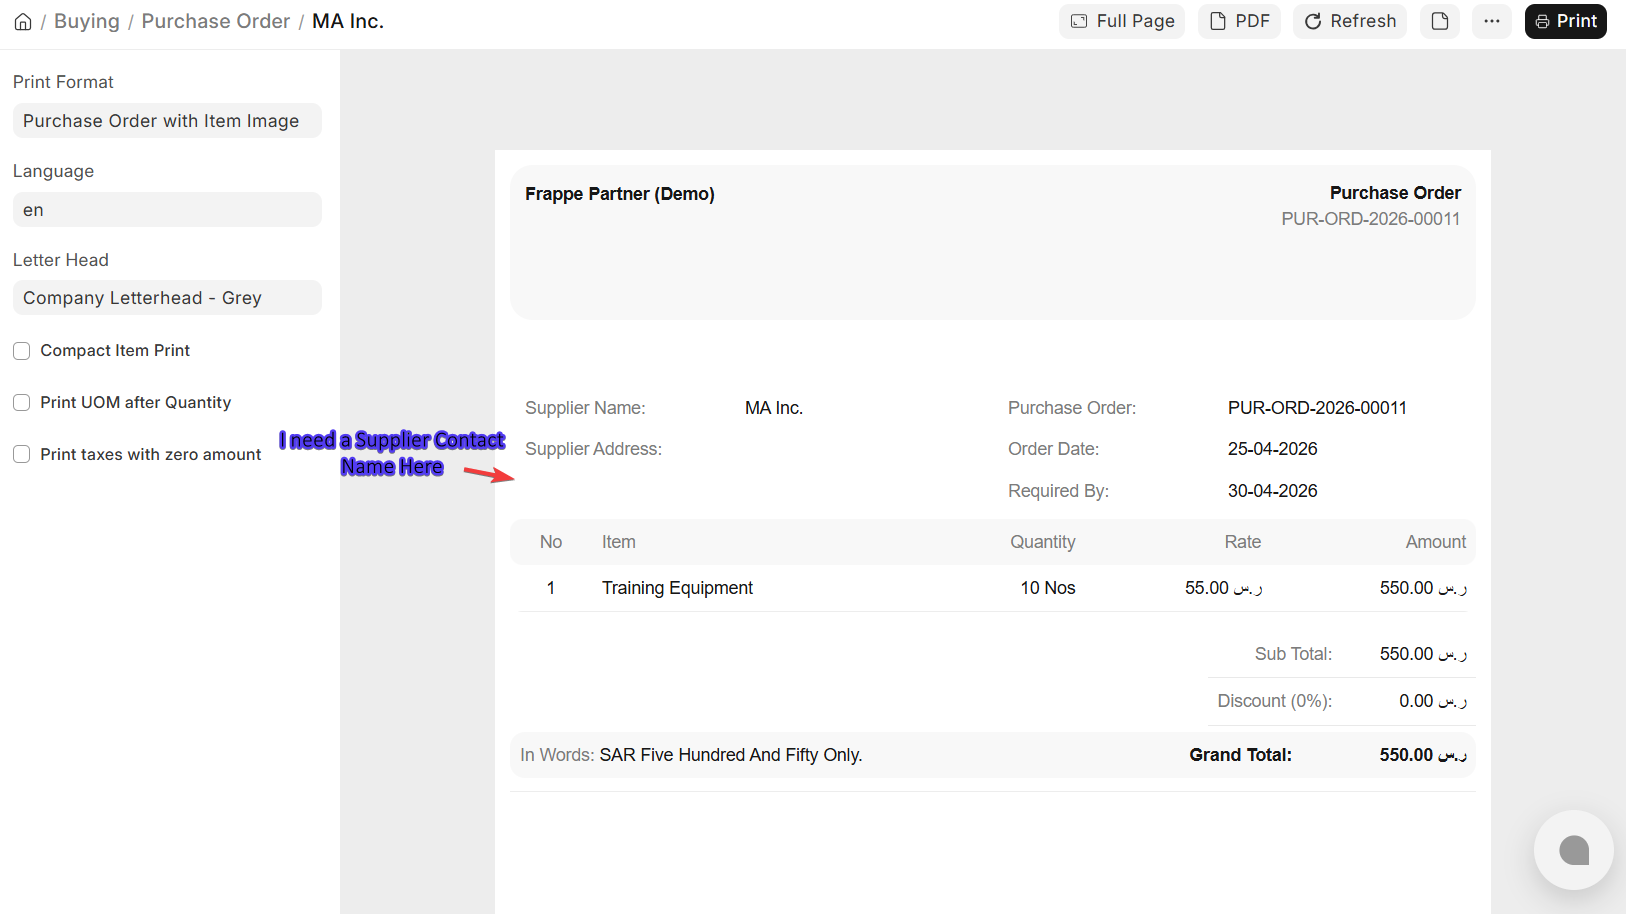
Step 1: Go to Print Format Customization.
- Open the document (e.g., Purchase Order) → go to Print View.
- Click on the Menu (⋮) in the top-right corner → select Customize.

ERPNext v16 opens the Print Format Builder, allowing you to visually edit the layout without writing code.
Step 2: New or Revise Fields in the Main Section.
- Search the field (e.g., Supplier Contact Name) with the search panel.
- After locating it, drag and drop it to a preferred location under Supplier Name.
You can also:
- Drag and drop to rearrange the fields.
- Space or group within sections.
- Make sure alignment is in line with current layout.
This enables restructuring of header and section-levels fields in the print format flexibly.
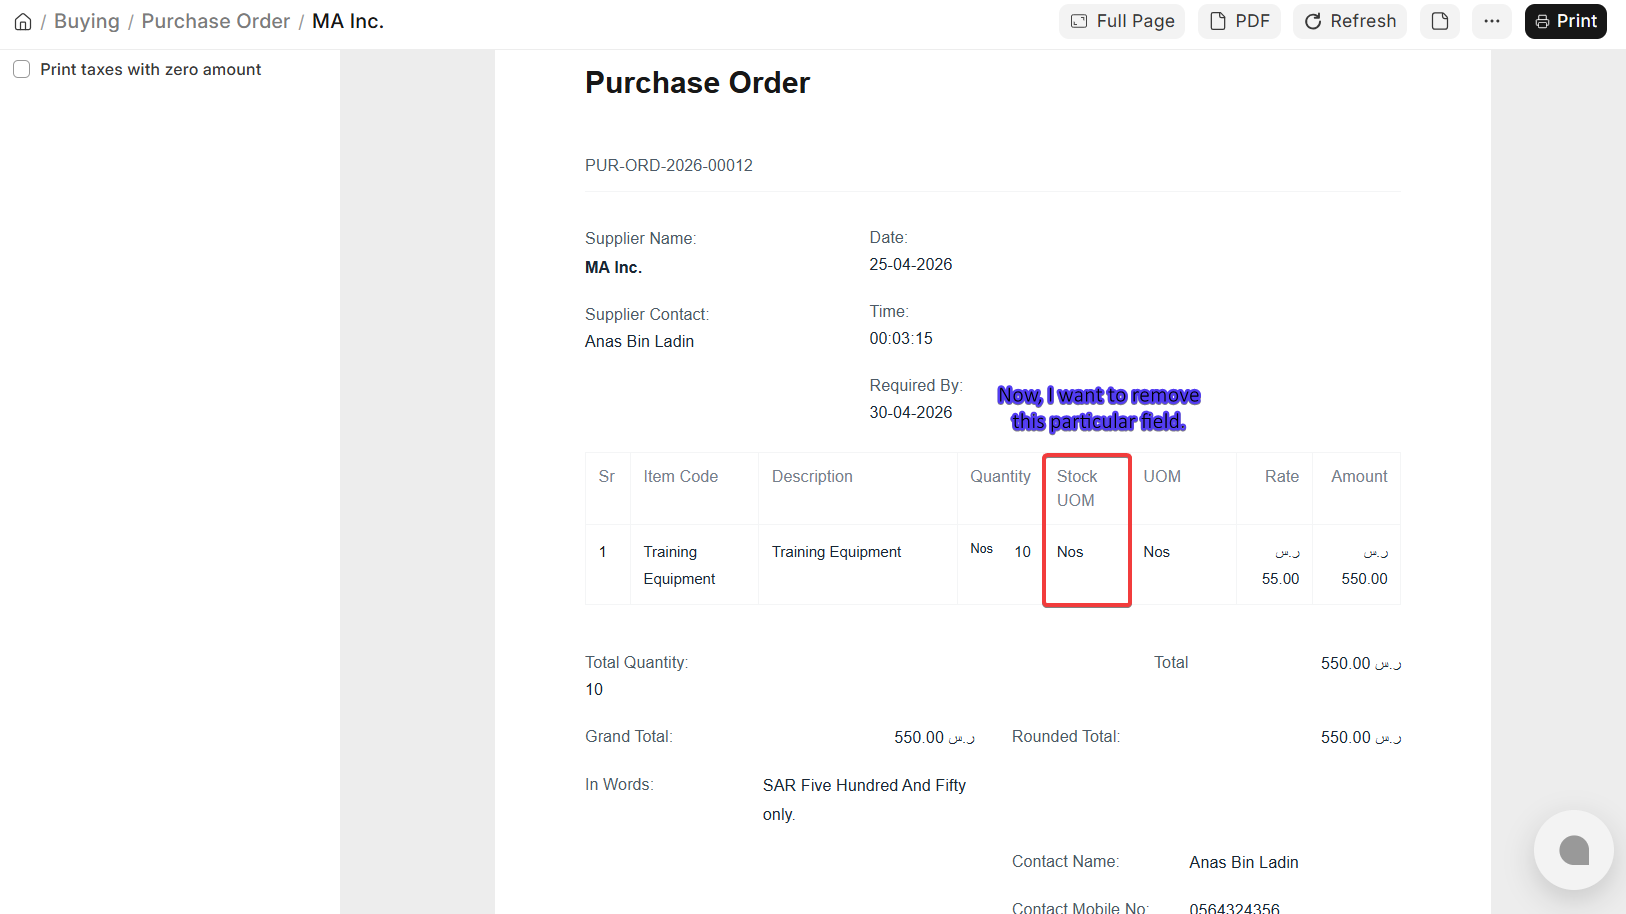
Step 3: Add/Remove Fields of Child Table (Item Table)
To change columns in a table (e.g. delete Stock UOM):
- Find the Items table section in the Print Format Builder.
- Click on “Select Columns”
- The list of available fields will be presented.
From here:
- Uncheck the fields which you would like to delete (e.g., Stock UOM).
- Fields to be added as checks.
- Drag columns up and down as necessary.
This immediately updates the item row display of the printed documents.
Step 4: Save and Preview Changes.
- Click Save in the Print Format Builder.
Check with Print Preview:
- Under Supplier Name is Supplier Contact Name.
- The Item table is stripped of Stock UOM column.
- Make adjustment again in case layout spacing or alignment requires to be refined.
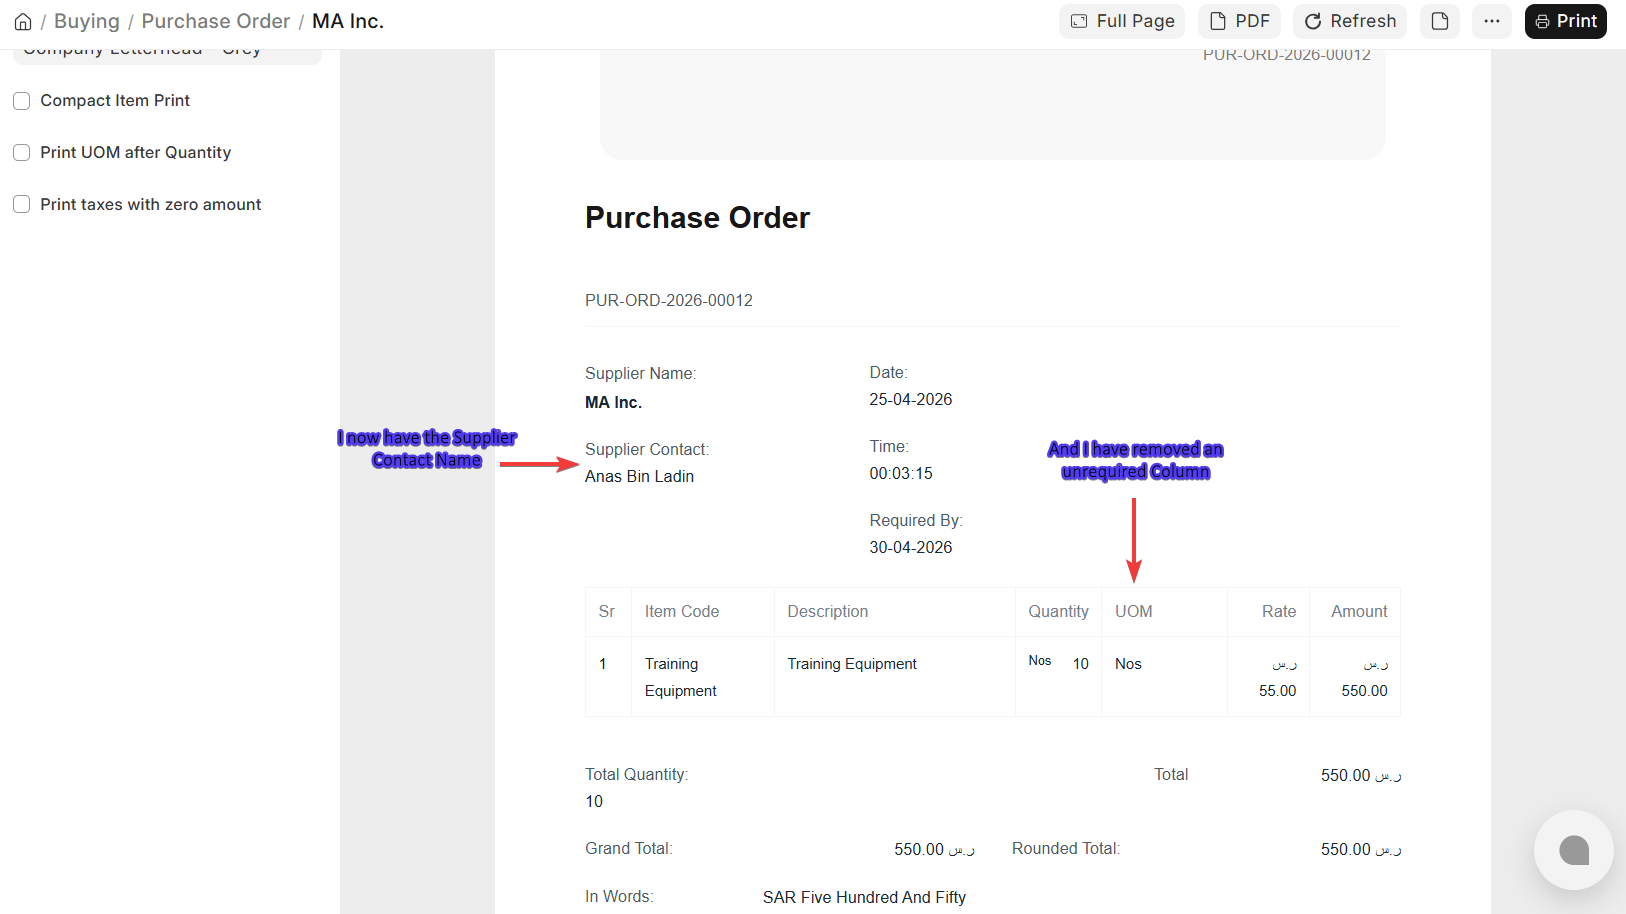
The result:
A Purchase Order Print Format with just the fields needed, enhanced visibility and fewer unnecessary columns, completely edited with the Print Format Builder in ERPNext v16.
Create your own tables in your Print Format Builder
To customize the Items table you have in your Print Format Builder, do the following (ERPNext v16):
1. Create a Print Format
- Select the document that you want to be customized (e.g. Purchase Receipt or Purchase Order).
- Tap on the Settings button (⋮ / gear icon) → tap Customize.
This will open the Print Format Builder in ERPNext v16 where you can make a full editable copy of the standard format. Give the new customized Print Format a meaningful name to be easily recognized in future.
2. Click Items Table Configuration
- Within the Print Format Builder, there is a section named Items (Table).
- Click on “Select Columns to set up the table structure.
This displays a configuration panel with all the fields of the Items child table.
3. Choose and Arrange Columns
A list of standard columns of the Items table will be shown.
From here you can:
- Select and/or unselect columns to show or hide them on the print version.
- Change column width to enhance spacing and readability.
- Drag and drop columns to reconfigure to your layout.
The final printed document will only contain the chosen columns.
4. Save Changes and Apply
Once set of columns has been chosen and positioned:
- Click on update to implement changes to the table layout.
- Click on Save to save the customized Print Format.
This is so your setup is saved to make use of later on.
5. Preview the Customized Print Format
- Relaunch the page and reopen the document.
- Select your recently created format (e.g., Purchase Receipt Custom) in the Print Format selector.
The Items table is now updated to contain only the selected columns and altered layout.
6. Compare to Standard Print Format
To verify differences, alternate:
- Normal template of print page.
- Your Print Version (Customized)
This is to check the way your selected columns, settings on order and width relate to the default layout. Final product is a fully customized Items table in your Print Format, based on your business needs, without other ERPNext standard format.
Printing Field Visibility
ERPNext v16 offers a Standard Print Format in every transaction with default display of all the fields. Should a user want to enable a certain field to be visible (e.g. Shipping Address in Sales Order), it can be controlled using Customize Form tool.
Step 1: Click on Customize Form
Navigate through:
Home > Customization > Form Customization > Customize Form
This tool enables you to manage field-level properties of any DocType, such as the print forms.
Step 2: Choose Document Type
- The list of DocTypes includes a variety of transactions, and one of them should be selected.
- In this case, select Sales Order as Document Type.
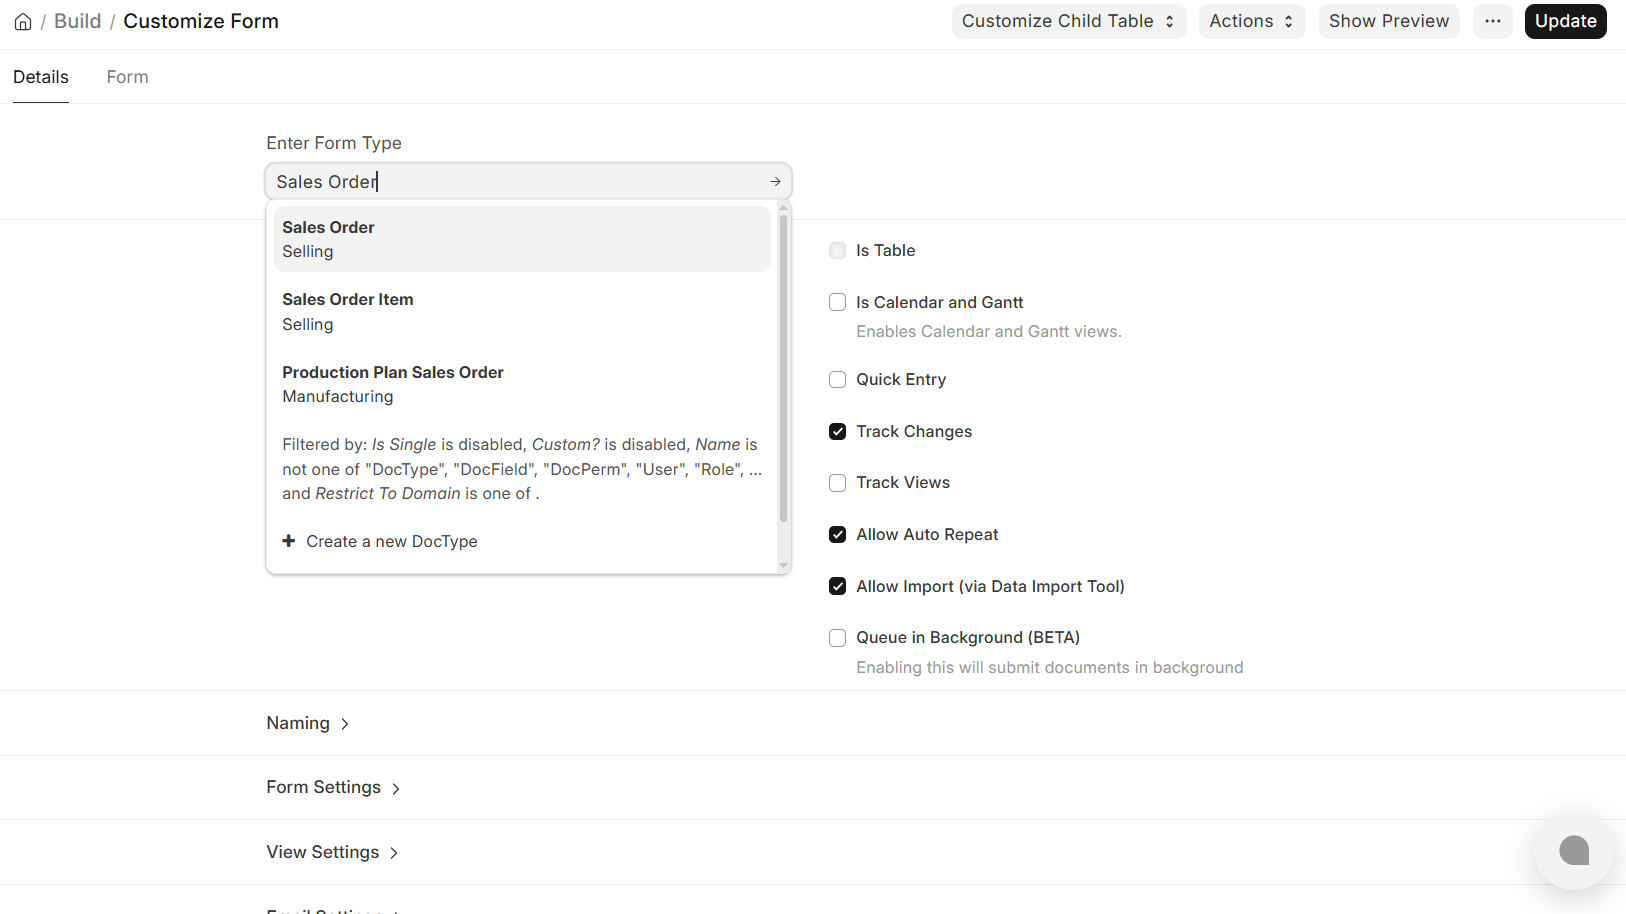
Upon selection, any fields associated with Sales Order will be shown to be configured.
Step 3: Turn Off “Print Hide” Feature
- Locate the field that you want to print (e.g., Company).
- Turn on the field setup.
Locate the option:
- Print Hide
- This can be automatically turned on to certain fields.
- Uncheck or Disable Print Hide to see the field in the Standard Print Format.
Step 4: Save and update Changes
To save your changes, Click Update in the Customize Form.
After saving:
- Reloading your ERPNext session.
- Open a Sales Order
- Go through the Print Preview to make sure that the field is now visible.
After doing this, the Shipping Address (or any field that is selected) will be automatically displayed in the Standard Print Format without the need of developing a custom print template.
Print “Centavo” in Words for USD
ERPNext v16 allows the currency fraction to be used in Amount in Words to be configured in the Currency DocType settings (e.g., Cent, Centavo, Paisa).
First, you have to configure Currency Settings (USD).
Go to:
Accounting → Setup → Currency
Open USD (or make it in case it is not there), set:
- Fractional Unit Name → Centavo
- Fractional Unit Value → 0.01
- Make sure Enabled is on.
- Enter Decimal digit number as necessary (typically 2)
This is what determines the expression of the decimal element of USD in words.
2. Have Currency Enabled in System
In case USD is added or edited:
- Ensure that it is Enabled.
- Make sure that there is an Exchange rate in the Currency Exchange table.
- Save the configuration
3. Usage of this in Print Format
ERPNext uses the currency configuration while generating:
- frappe.utils.money_in_words()
- “Amount in Words” field in Print Formats
Therefore when the Currency DocType is updated, the system will automatically convert:
Example:
123.45 USD = One Hundred and twenty-three dollars and forty five cents.
4. Use in Print (No Change of Code Required)
In your Print Format:
- Make sure to add In Words / Grand Total (In Words) field.
- This will not need any further customization unless you are dealing with a custom script.
5. Refresh and Verify
- Save Currency changes
- Reload ERPNext
- Print any Sales Invoice / Purchase Order
- Ensure that Centavo is reflected in amount in words.
Result:
UK Fractional USD will now automatically replace Cent with Centavo in all Print Formats.
Visit Us Here