
Purchase Receipt
A Purchase Receipt is generated when you receive goods from your supplier, typically against a Purchase Order. It updates the stock ledger and tracks the accepted and rejected quantities and warehouse locations.
You can also generate a Purchase Receipt directly without a Purchase Order if Is Purchase Order required for Purchase Invoice & Receipt creation? is set to “No” in Buying Settings.
Go to:
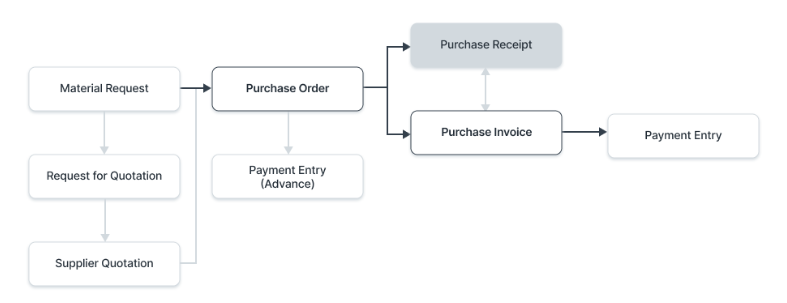
1. Prerequisites
Before making a Purchase Receipt, it is advisable to have the following:
- Purchase Order (optional if direct Purchase Receipts are permitted)
Note: From version 13, ERPNext employs an immutable ledger. This Alters stock entry rules for canceling and posting backdated transactions.
2. Creating a Purchase Receipt
From a Purchase Order (Recommended)
- Open the Purchase Order.
- Click Create > Purchase Receipt.
- Items, rates, warehouses, and supplier details will be automatically retrieved.
Manual Creation (Direct)
- Go to the Purchase Receipt list and click New.
- Select Supplier and enter Date and Posting Time.
- If you have a supplier delivery reference, fill it in Supplier Delivery Note.
- Click Get Items From > Purchase Order if necessary, or fill items manually in the Items table.
- Set Accepted Warehouse for approved stock and Rejected Warehouse for defective stock.
- Fill in Accepted Quantity and Rejected Quantity.
- Rates and amounts will be automatically calculated.
- Save and Submit.
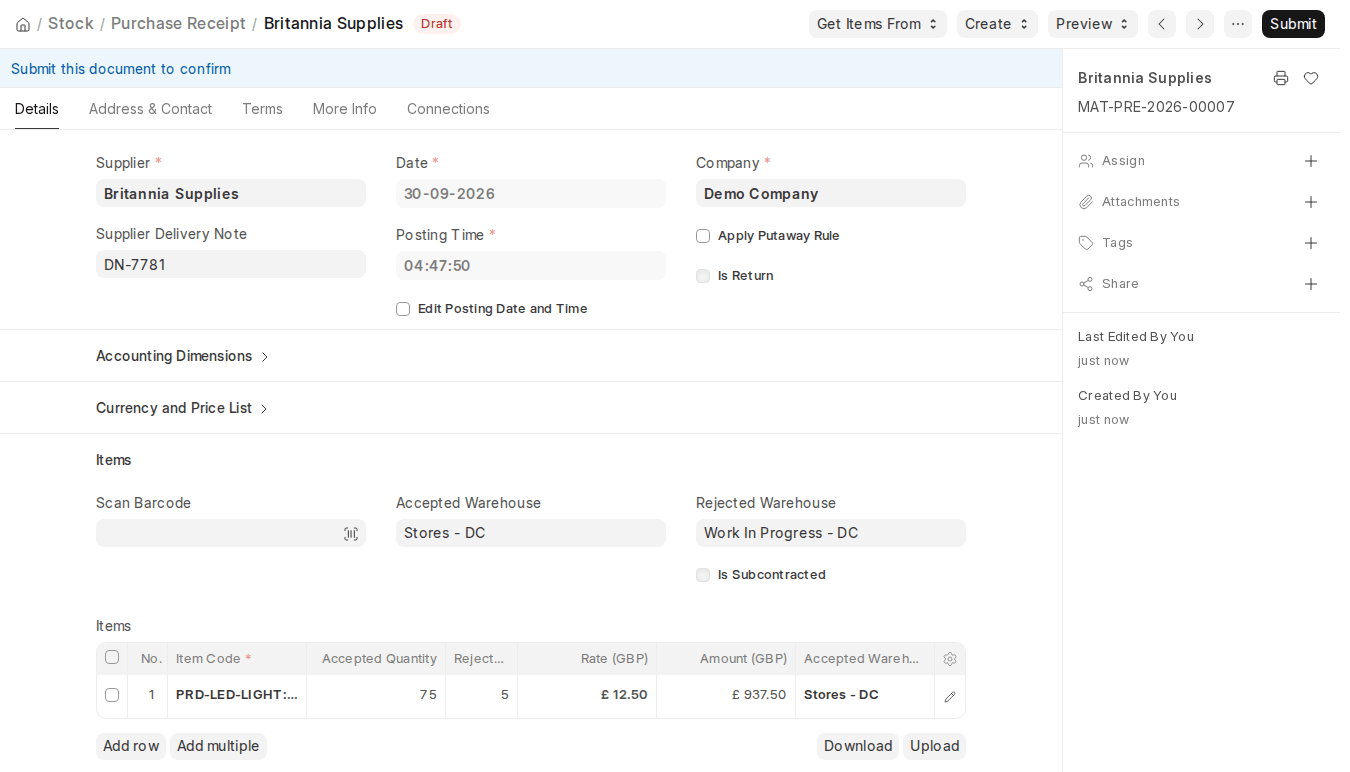
3. Important Sections
3.1 Details
- Series – Document naming series.
- Date & Posting Time – Automatically set to current but can be modified by selecting Edit Posting Date and Time.
- Supplier – Supplier supplying the goods.
- Supplier Delivery Note – Reference number or note from the supplier.
- Apply Putaway Rule – Tick to allocate items to warehouses automatically according to Putaway Rules.
- Is Return – Read-only; it is set automatically when you return goods to the supplier using Create > Purchase Return on a submitted Purchase Receipt.
3.2 Items Section
- Scan Barcode – Put things in and out with a barcode scanner.
- Accepted Warehouse – Warehouse in which stock is approved.
- Rejected Warehouse – Storage facility of rejected/defective products at the warehouse.
- Is Subcontracted – Read-only; shows whether the receipt is for subcontracted items.
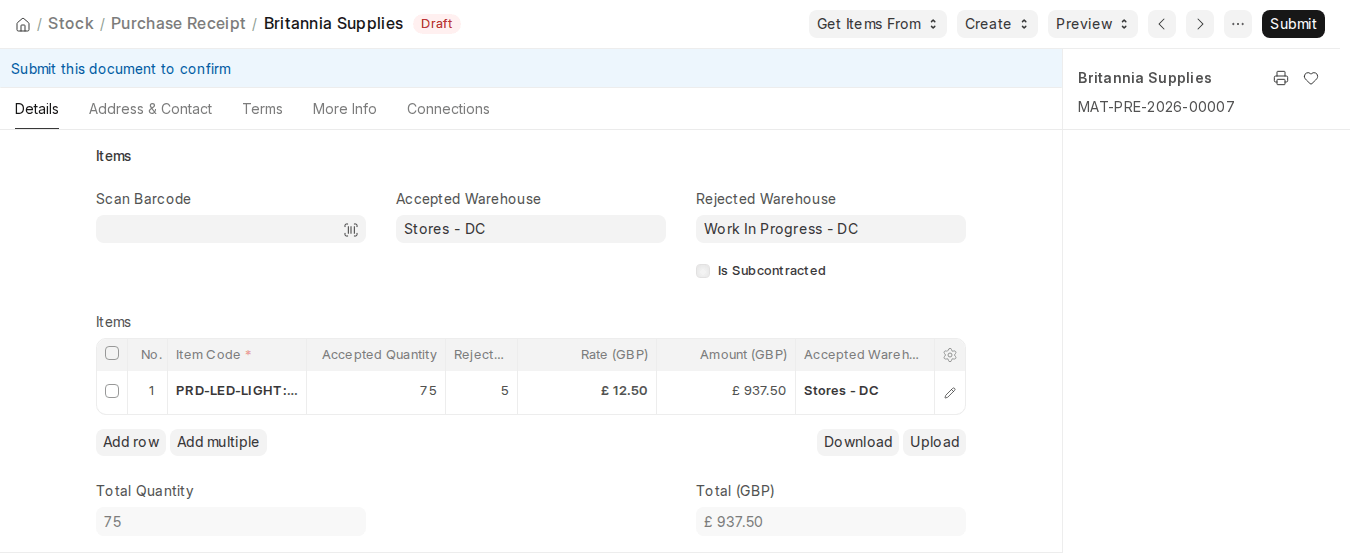
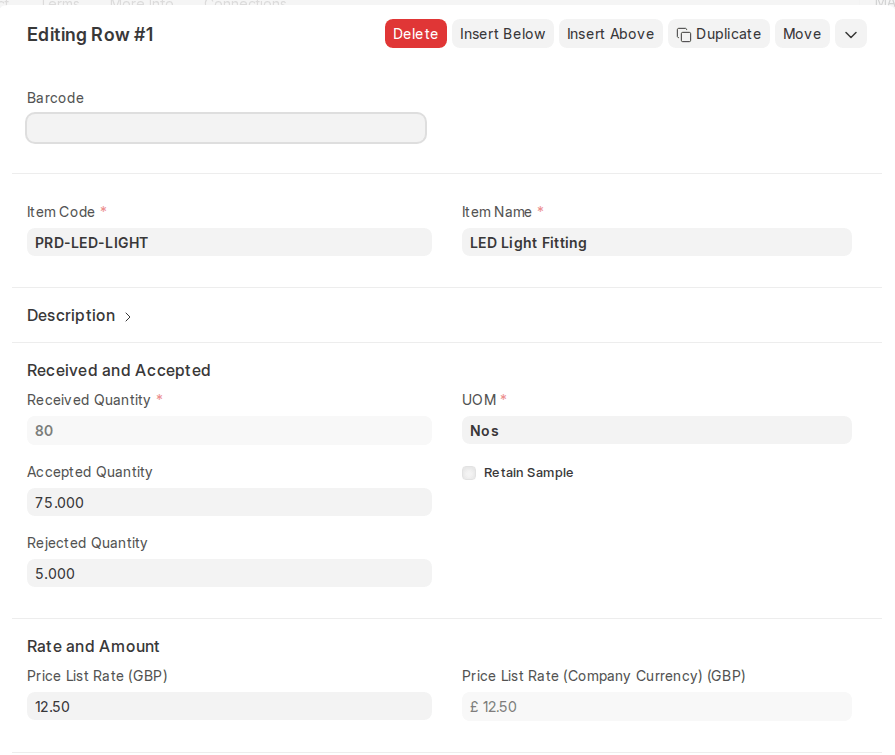
Items Table Fields:
- Item Code – Selected from Item Master.
- Received Quantity – Total quantity delivered by the supplier.
- Accepted Quantity – Quantity added into stock.
- Rejected Quantity – Quantity transferred to rejected warehouse.
- Rate & Amount – Retrieved from Price List or Purchase Order.
- UoM Conversion Factor – Shown when the purchase UOM differs from the Stock UOM; update it if the PO uses a UOM other than the stock UOM.
3.3 Currency and Price List
- Currency defaults from supplier or PO settings.
- Set Conversion Rate if transaction currency is other than company base currency.
- Check Ignore Pricing Rule to ignore pricing rules.
3.4 Warehouse Details
- Accepted Warehouse – Primary storage facility for approved items.
- Rejected Warehouse – Warehouse for defective items.
- Raw Materials Consumed – In subcontracting, this section records the raw materials consumed from the Supplier Warehouse.
3.5 Quality Inspection
If an item is to be quality inspected (defined in Item Master), you need to attach a Quality Inspection document while submitting.
3.6 Taxes and Valuation
- Taxes are retrieved from Purchase Order or Tax Template.
- Shipping charges can be included through Shipping Rule.
- Extra discounts can be applied against the entire receipt.
3.7 After Submission
- Stock Ledger Entries are generated for accepted and rejected items.
- Linked Purchase Orders’ pending quantities are updated.
- You can directly create a Purchase Invoice from the Purchase Receipt using Create > Purchase Invoice. The Create menu also offers Landed Cost Voucher, Purchase Return, Make Stock Entry and Sample Retention Stock Entry.
3.8 Statuses
- Draft – Saved but not submitted.
- To Bill – Waiting for purchase invoice.
- Partly Billed – Purchase invoice created for part of the receipt.
- Completed – Fully billed.
- Return – The document is a return (Is Return) against an earlier Purchase Receipt.
- Return Issued – All items returned.
- Cancelled – Receipt cancelled.
- Closed – Short closed, no more receipt expected.